How to Set Up Apple Pay on a WordPress Site
If you’re using WooCommerce, you get a lot of options for which payment gateways to use on your site. Out of the box, the plugin supports PayPal and Stripe. If you want to integrate more options, however, you’ll need to do a bit of tinkering.
These days, Near-Field Communication (NFC) payments are growing in popularity. Apple Pay, a payment gateway that leverages that technology, is also on the rise. Adding support for it to your eCommerce website can net you additional conversions.
In this article, we’re going to talk about Apple Pay and how it works with WordPress. Then we’ll introduce some plugins you can use to integrate WordPress with Apple Pay. Finally, we’ll teach you how to use Apple Pay alongside WooCommerce. Let’s dive right in!
Apple Pay for WordPress

As you may know, WordPress doesn’t support online payment processing out of the box. For that, you’ll need to use a third-party service. This is where Apple Pay comes in to the picture.
Before we get to the technical details, let’s talk about why you should consider using Apple Pay. This service enables your users to pay with credit and debit cards stored on their phones, so they don’t have to re-enter the information every time they buy something.
Apple Pay is hardly the only platform that does this. What sets it apart is its NFC integration, and the fact that it’s built into the iOS ecosystem. Apple users may be more likely to make a purchase on your site if they see an option they recognize and trust.
As a business owner, the first question you need to ask yourself is: “How much will it cost me to use this payment gateway?” Apple Pay charges a base 3% fee for credit card payments, and it processes debit charges for free.
That 3% is slightly higher than the base rate of competitors such as PayPal and Stripe. However, Apple Pay doesn’t add on any extra charges, so it usually works out in your favor.
It’s also worth noting that there’s nothing stopping you from adding multiple payment gateways to WordPress. However, in this guide we’re going to focus on integrating Apple Pay specifically.
How to Set Up Apple Pay for WordPress using WooCommerce
With WordPress, the easiest way to add new features to your website is usually through plugins. Apple Pay integration is no exception.
When it comes to plugins, your best option is WooCommerce, which is WordPress’ eCommerce standard-bearer. WooCommerce enables you to add Apple Pay support to your website, and the process isn’t complicated.

Unfortunately, there are almost no dedicated plugins that support Apple Pay outside of the WooCommerce ecosystem. That means you’ll definitely want to use WooCommerce, unless you’re up to the challenge of developing a new standalone plugin.
Apple Pay WordPress Plugins
If you look around for Apple Pay WordPress plugins, you’ll find several options. However, upon closer inspection, you’ll see that they’re all WooCommerce extensions designed for Stripe. That is because Stripe lets you easily add Apple Pay support to your website through its platform.
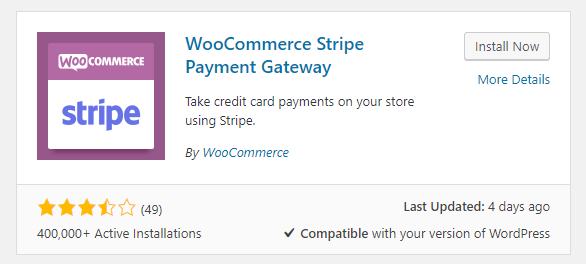
For example, there’s the WooCommerce Stripe Payment Gateway extension, which includes support for Apple Pay, Alipay, and regular credit card payments:

There’s also Braintree for WooCommerce, which is one of the only non-Stripe related options. This extension supports credit cards, PayPal, Google Pay, and Apple Pay:

It’s important to note that WooCommerce supports Apple Pay integration natively, so you don’t need an extension. However, the process for enabling it is rather time-intensive, so we’ll be teaching you how to set up Apple Pay for WordPress through Stripe instead.
Apple Pay for WooCommerce
As we’ve mentioned, WooCommerce is the most popular WordPress eCommerce solution. In 2017, WooCommerce developers added support for Apple Pay through the platform. However, enabling the Apple Pay integration manually can be a bit complicated, to say the least.
With that in mind, we’re going to teach you how to enable Apple Pay using the Stripe with WooCommerce extension. Before we proceed, make sure you install and activate WooCommerce itself.
Step 1: Set Up Stripe for WooCommerce
It’s worth noting that for Stripe to work with WooCommerce, you’ll need to enable SSL on your WordPress website. Fortunately, WP Engine makes it easy to add an SSL certificate to your site.
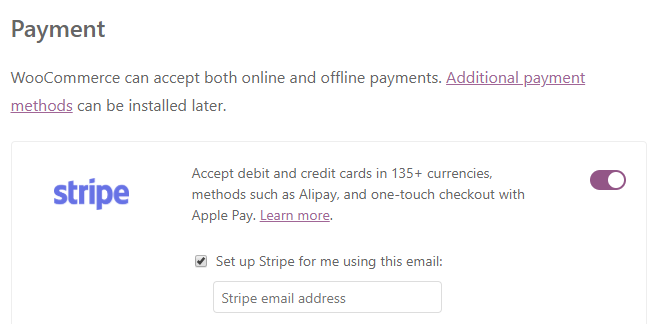
When you first install WooCommerce, the plugin will walk you through a setup wizard. There, you’ll find the option to enable Stripe payments on your website:

Toggle this setting on, and then finish going through the rest of the wizard.
If you installed WooCommerce earlier, and skipped the Stripe setting, don’t worry. You can still enable Stripe support for WooCommerce. Go to the Plugins > Add New tab in your dashboard, and use the search bar to look for the WooCommerce Stripe Payment Gateway extension:

Click on the Install Now button, and give the platform a second to set everything up. Once the plugin is ready, click on Activate as well.
Step 2: Enable Apple Pay Payments Within Stripe
Before you can get started with Stripe and Apple Pay payments, you’ll need to do two things. The first is to add your Stripe account keys to WooCommerce, and the second is to enable Apple Pay payments.
Fortunately, you can do both on the same screen. To find the right options, navigate to the WooCommerce > Settings > Payments tab and look for the Stripe setting. Once you find it, click on Manage:

On the next screen, you’ll find two fields labeled Live Publishable Key and Live Secret Key:

You can get both of those from your Stripe account. Once you do, paste them into the corresponding fields. Afterwards, scroll down until you see the Payment Request Buttons option, and enable it:

This setting automatically enables Apple Pay when someone tries to pay via Stripe using Safari. All you have to do is save the changes to your WooCommerce settings, and you’re good to go.
Improving the Digital Experience from Start to Finish
Your choice of payment gateways affects more than how much you pay in fees. Ideally, you want to choose an option that’s as easy as possible for your visitors to use. That way, you’re removing obstacles between your business and potential sales.
Services such as Apple Pay might not have hit critical mass yet, but it’s likely that NFC payments will continue to increase in popularity. Using Apple Pay on your website is a smart move, and with WooCommerce the process of setting it up is simple.
If you’re a WP Engine user, you’ll be happy to know that all of our plans are optimized for eCommerce, and for WooCommerce in particular. Check out the benefits of our WordPress hosting platform or learn more about our eCommerce-specific plans!
