Get Started


Key Takeaways
Local WordPress development is essential for professional websites. Developing websites locally is the standard for WordPress professionals due to its simplicity and efficiency.
Site migration involves moving files and databases. Understanding the components of WordPress migration is crucial for successful deployment.
Using migration plugins streamlines the deployment process. Migration plugins like All-in-One WP Migration simplify the movement of files and databases to remote servers.
Local Connect with WP Engine and Flywheel offers the simplest deployment method. Leaders can leverage this method for hassle-free site deployment.
Developing websites on your local machine is the de-facto method for professional WordPress development.
There are a ton of ways to set up a local WordPress development environment, and if you’ve used Local, you know how ridiculously simple it is to spin up a WordPress install.
What might not seem so simple, however, is how to go about deploying a site you’ve developed with Local. What’s the best way to go about it?
That’s what we’re discussing in this article. Specifically, we’ll cover:
Note that this article will use the terms “deploy” and “migrate” interchangeably. Also, when referring to the local instance of your site, it might also be referred to as “origin.” Similarly, when referring to the destination site, it might be referred to as “remote,” “live,” or “production.”
Spoiler alert: using Local Connect with WP Engine and Flywheel is hands down the simplest method. But, regardless of which method you choose, we’ll walk you through the process and address some common hurdles.
Site Migration 101: What You Need for Any Migration
WordPress is made up of files and a database, so when we talk about migrating a site, we’re talking specifically about moving those two things.
If you download WordPress or look at the file structure of an existing WordPress install, you’ll find three folders and a handful of files in the root directory:
-- root
-- /wp-includes
-- /wp-admin
-- /wp-content
One of those files in the root directory is particularly important to this conversation and that’s wp-config.php. We’ll mention that later. It’s also important to point out that the /wp-content folder is where theme and plugin files live.
When moving a site to a host where WordPress is already installed, the only folder you’ll need to move is /wp-content.
Deploy Your Site from Local Manually via Sftp or cPanel
If your destination site is with a host that supports cPanel and/or SFTP, migrating site files this way has a relatively low barrier to entry. (Not as easy for the database, but we’ll get there in a moment).
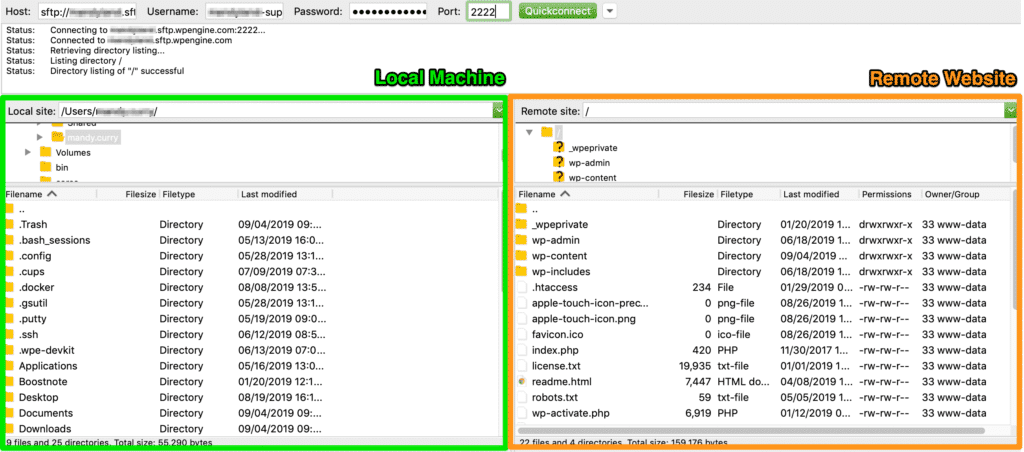
cPanel File Manager is one method you can use to upload, move and remove files on a remote server. You can alternatively use an SFTP client such as FileZilla (works with any operating system) to transfer files from your local machine to a remote server. If you’re not familiar with SFTP, here’s a primer.
Once you’re set with your file transfer method, here’s what you need to know about deploying a site created with Local.
1. Moving site files
Your Local site files are located on your machine at Local Sites > yoursitename > app > public.
From there, use cPanel File Manager or SFTP to move /wp-content to the root directory of the remote install.
2. Export the Local site database
By default, Local uses Adminer for database management. To access the database of your Local site:
- Launch Local
- For whichever site’s database you want, click Start Site
- Click on the Database tab
- Click Adminer to open the database UI
- Click Export to prepare your database export
- Leave the default options as-is, with the exception of changing the output to gzip
Here’s a video showing the above steps.
3. Importing site database on remote server
From your web host, you’ll need to locate your database manager. There’s a good chance your host is using phpMyAdmin, but if it’s not, just look for the database option.
Once your database manager is open, note the WordPress table names that already exist. They likely start with the wp_ prefix.
Before importing your database, you’ll want to drop existing database tables. Here’s a tutorial outlining the process of how to import a WordPress database.
A few considerations to note:
- The table prefix of the database you’re importing needs to match the table prefix specified in the remote server’s wp-config.php file.
- You’ll want to use a plugin like Better Search Replace to do a universal find/replace of development URLs with your host URL.
Pros and cons of deploying via SFTP
Before we move on from the SFTP method, let’s highlight some pros and cons.
Pros:
- A familiar file browser interface for moving files and folders
- Granular control over individual files and folders
Cons:
- It’s easy to move files to the wrong folder
- There’s no version control
- If you accidentally overwrite a file (or folder), it’s gone (though you could restore from a backup, if you have one)
- There’s no automation – you manually move files/folders from origin server to destination
- You have to manually export and import your database
- You may need to update the database table prefix in the remote server’s wp-config.php
- There’s no concept of “syncing” local changes with the remote server (or vice-versa)
Deploy Your Site from Local Using a Migration Plugin
Deploying your site with a migration plugin is typically more user-friendly than a cPanel migration.
From a birds-eye view, the process is similar in terms of moving your files and your database from your local machine to a remote server, but this method involves a bit more automation.
There are multiple plugins available to handle this type of deployment and a few of the most popular options are All-in-One WP Migration, WP Migrate DB, and Duplicator.
All-in-One WP Migration is one of the most streamlined backup and migration plugins, designed for non-technical users. We’ll use it for our example of deploying a site from Local to a web host.
Here are the steps you’d take for this type of migration.
1. Install the plugin on your Local site and your production site
You’ll use the All-in-One WP Migration plugin both to export your Local site and to import to your destination site.
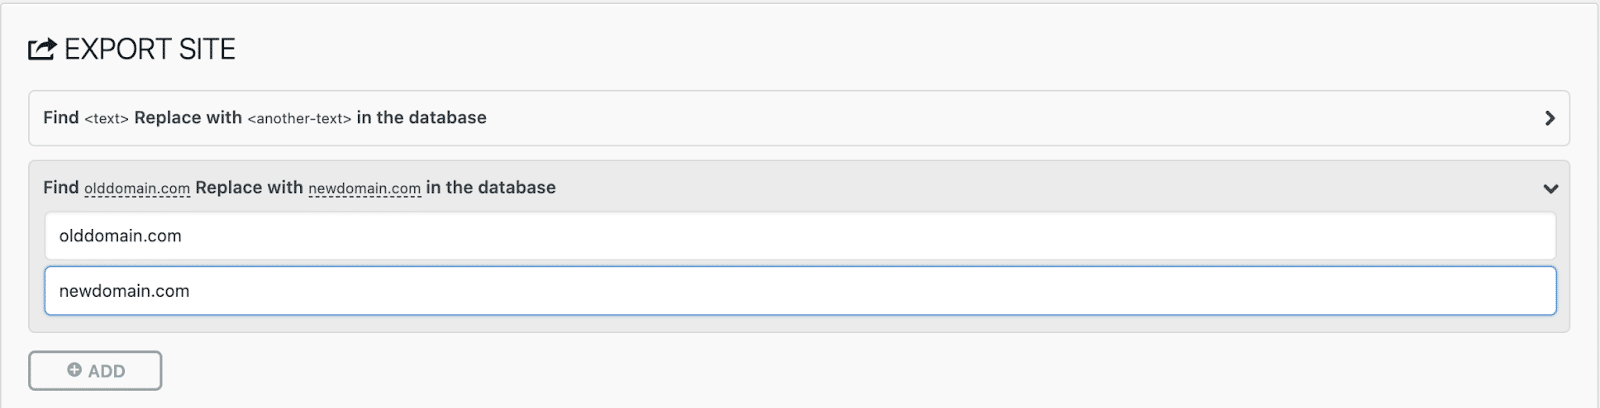
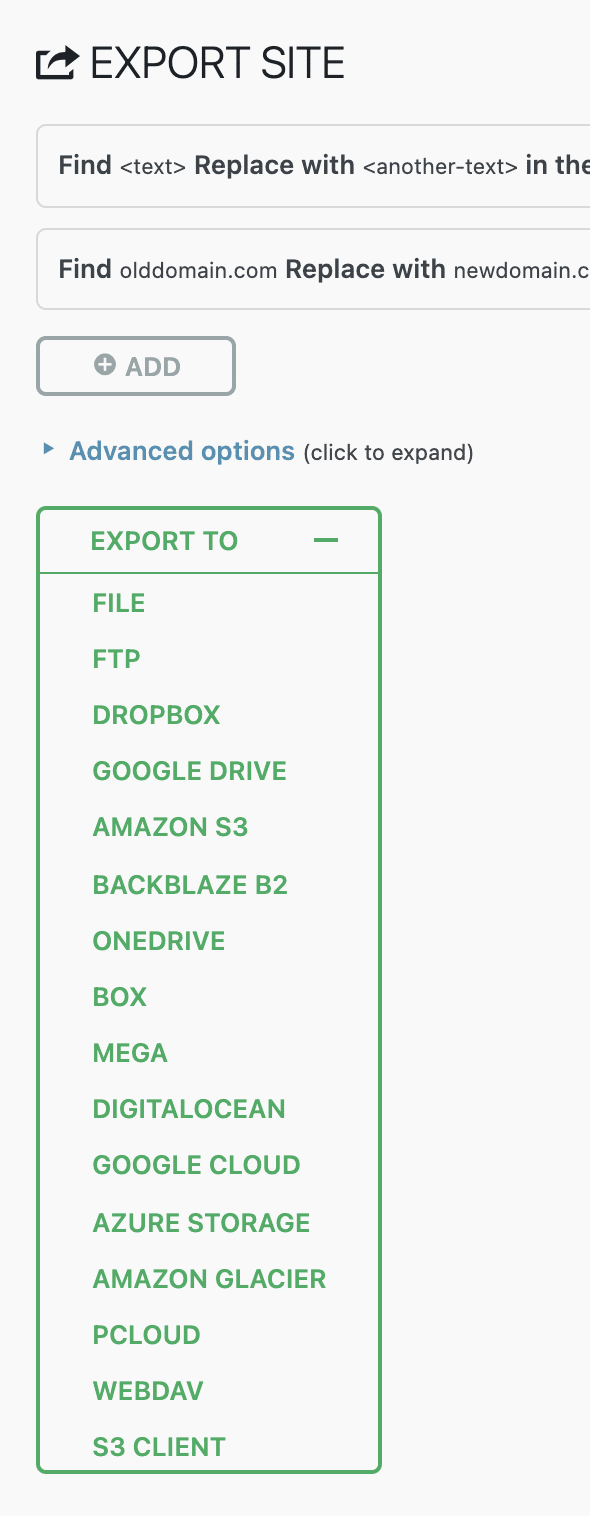
2. Add find/replace rules (optional)
If you want to change your local URL to the remote server URL (or any other find/replace operations in the database), you have the opportunity to do this prior to exporting your site.
3. Set advanced options (optional)
All-in-One WP Migration also gives you the ability to pick and choose a handful of options that will (or will not be) included in your export. As an example, some of these options include:
- Not exporting spam comments or post revisions
- Not exporting the media library, themes, or plugins
- Not exporting the database at all
4. Create an export file
From the admin of your live site, go to All-in-One WP Migration > Export and create a copy of your site (files and database). With the free version, you can export your site to a file. You’d need to purchase an extension if you wanted to export directly to a third-party service, such as Google Drive or Dropbox.
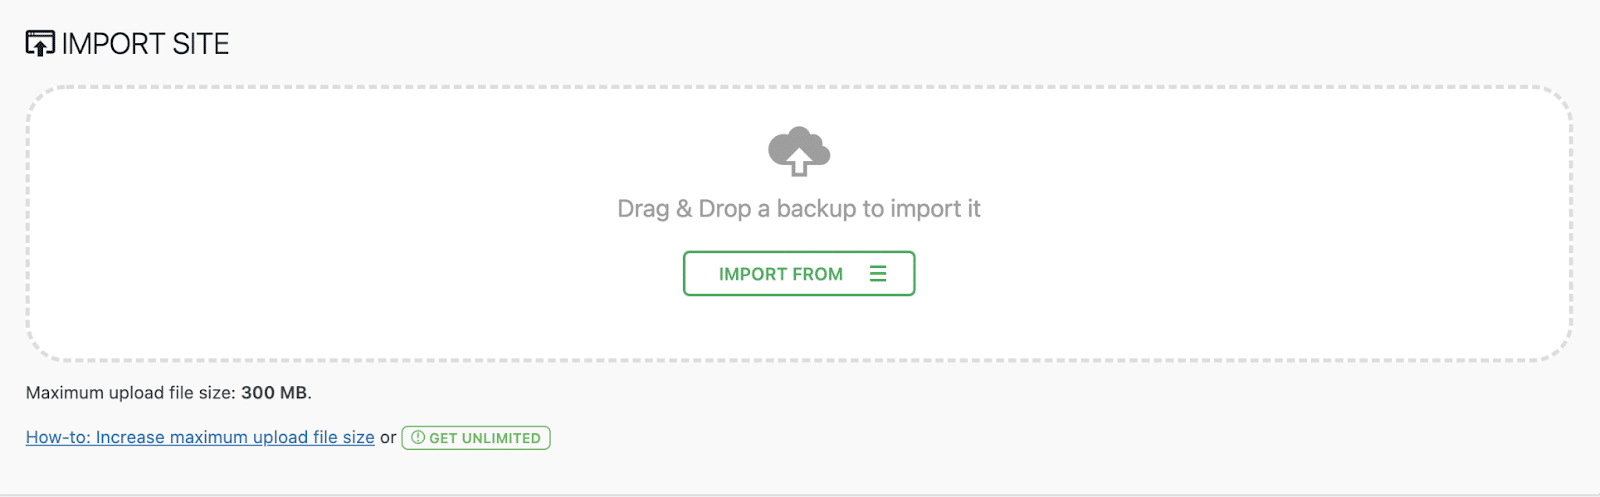
5. Import the site copy on the live site
From the admin of your live site, go to All-in-One WP Migration > Import and drag & drop your exported file. Note that you’re limited to files that are 300MB or less with the free version.
Pros and cons of deploying via All-in-One WP Migration plugin
Before we move on from using migration plugins, let’s highlight some pros and cons.
Pros:
- Works on all hosting providers
- Includes the ability to find/replace your development URL with your live URL as part of the migration process
- Great for small sites
- Great for creating site backups
Cons:
- For additional export options or sites larger than 300MB, you need to pay
- While simpler than using SFTP and a database manager, the process isn’t fully automated
- You may still need to use a plugin on the destination site such as Better Search and Replace to replace URLs stored as serialized data
- You may need to use a plugin such as Regenerate Thumbnails if images do not appear in your media library
- For larger sites with larger databases, you may run into server timeouts when creating the copy of your site
If you’re looking to migrate your site from another host directly to WP Engine (skipping Local altogether), there’s a hassle-free way to do that using the WP Engine Automated Migration plugin.
Deploying via Local Connect with WP Engine and Flywheel
Ok, we saved the best and easiest for last! And while we’re definitely biased, deploying a site via Local Connect is truly a breeze.
At the time of this writing, Local Connect only supports sites hosted on WP Engine or Flywheel, so if you want to deploy to another WordPress host, you’ll need to use one of the previous methods discussed.
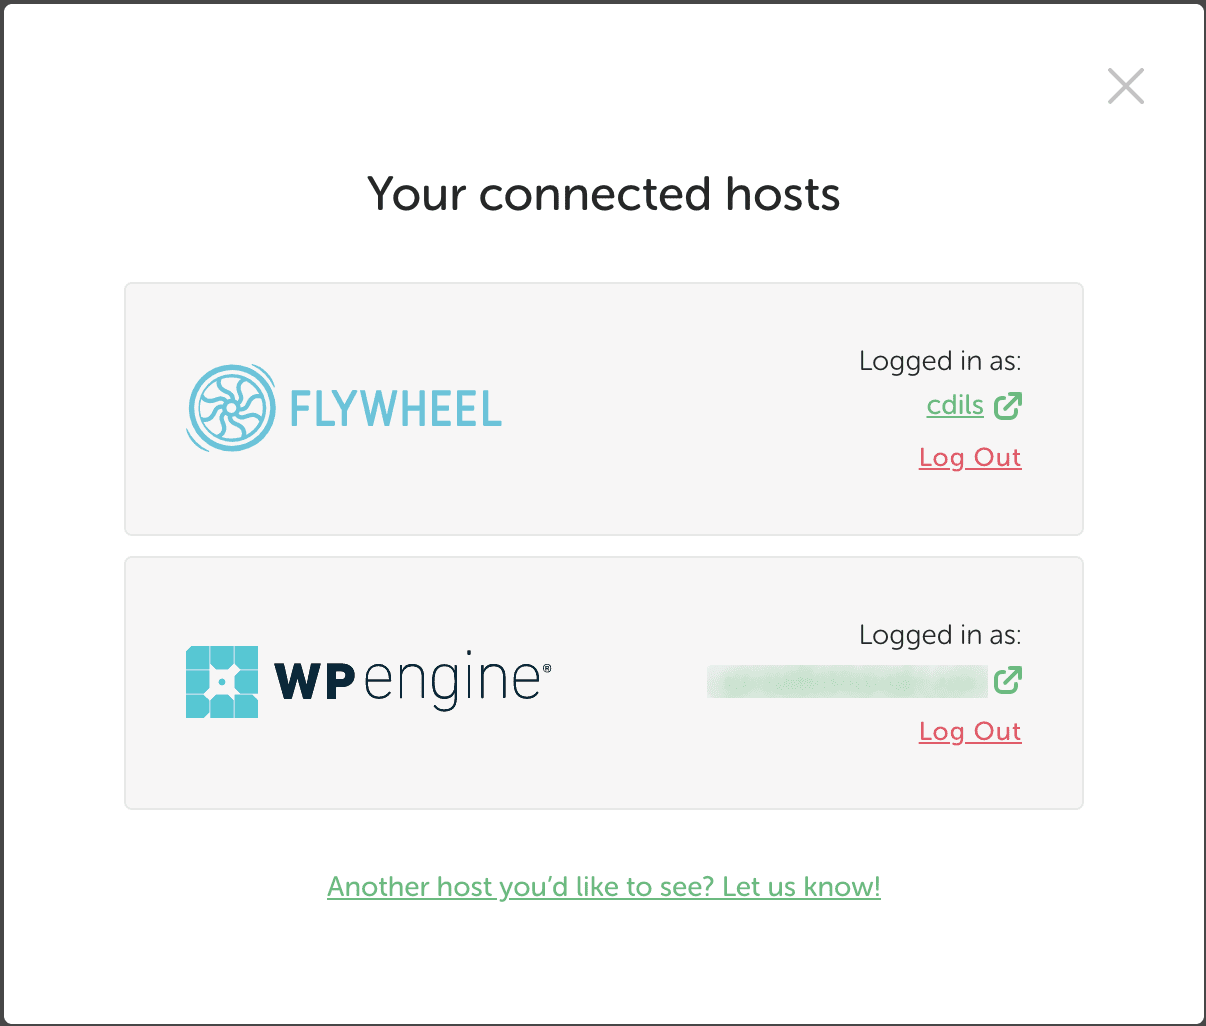
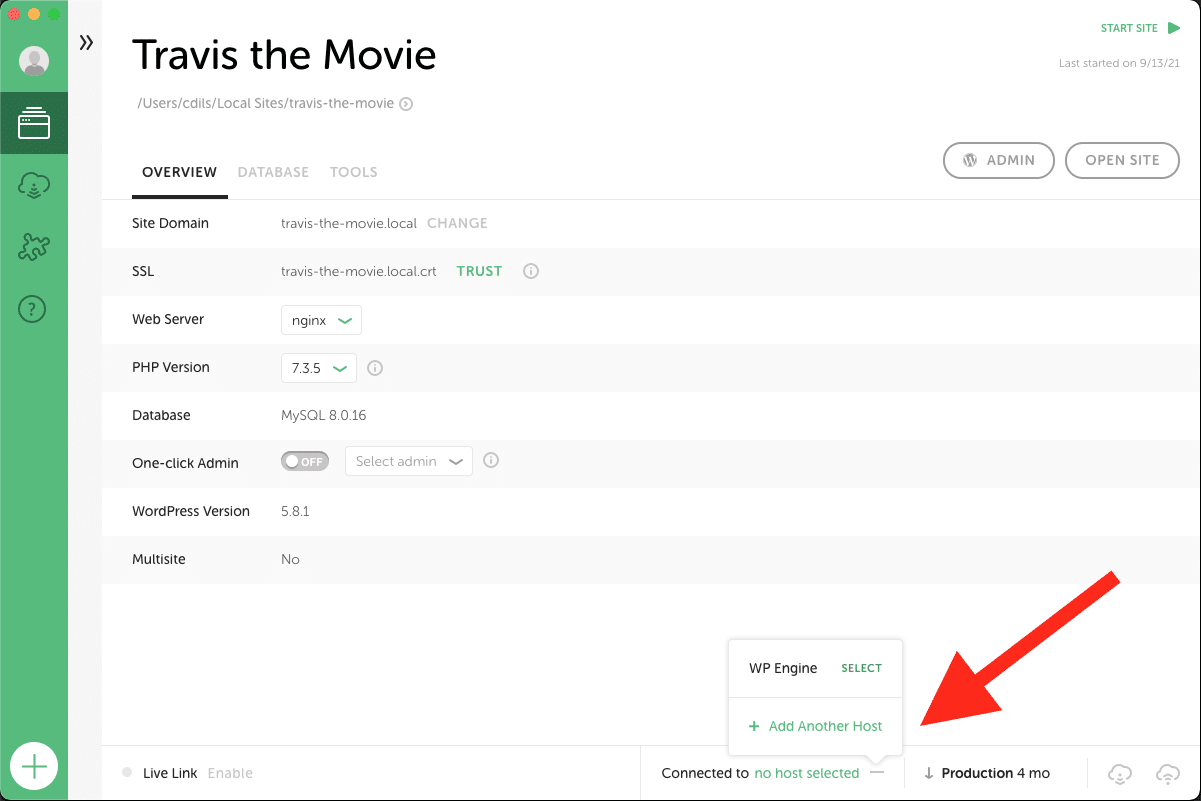
1. Log in to Host
From Local, click on the Connect icon to access the My Hosts option, where you can log in to WP Engine and/or Flywheel.
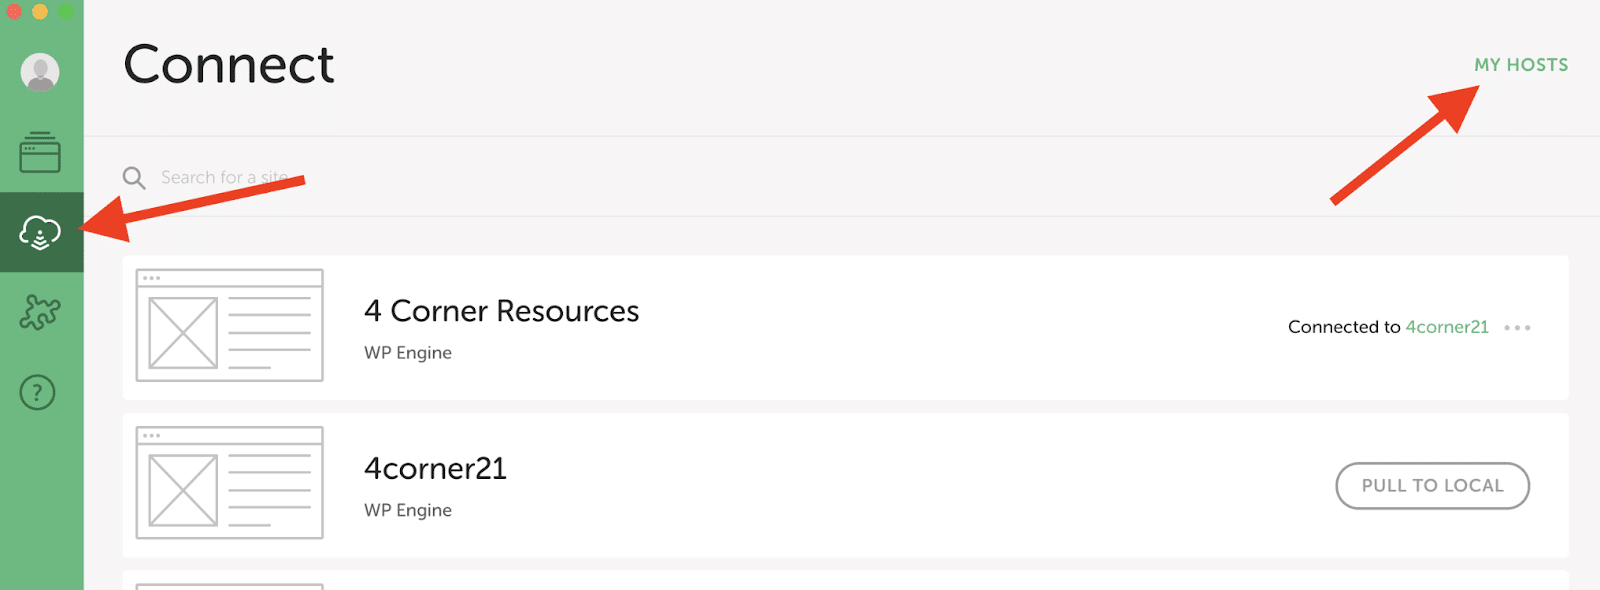
Once connected, you can view all sites connected to the hosting account. You can PULL an existing site (and a specific environment) to Local. That’s not what we’re covering in this article, but it’s a great way to take an existing Flywheel or WP Engine site and environment and one-click import the site to Local.
2. Connect Local site to host
Once you’ve logged into a host, you can connect the Local site you want to migrate to the host you want to deploy to (Flywheel or WP Engine).
3. One-Click Push to Deploy
Once a site is connected to the host, you can click the PUSH button to begin the push process. If it’s your first time pushing this site, you’ll need to select the existing site you want to push to and the site environment you want to overwrite.

After that, any future times you click the PUSH button, the site will automatically push to the remote server based on your previous selections.
4. That’s it!
Were you hoping for more steps? Too bad, you’re done! Go view your Local site on WP Engine or Flywheel!
Here’s a video showing the above steps.
[insert video]
Pros and cons of deploying via Local Connect
Pros:
- One-click deploy kicks off a full automation to migrate sites from Local to WP Engine or Flywheel
- Use MagicSync to tailor the files and folders you want to push, helping you prevent accidental overwrites
- In addition to MagicSync allowing you to control exactly what is deployed, using Connect does more for your deployment process:
- Cache busting: We’ll clear your site’s cache when you launch changes.
- Backups: We back up your site every two hours when you’re pushing changes.
- Security: Unlike FTP (which exposes a direct connection to your site), MagicSync is routed through a separate micro-service before deploying.
Cons:
- Sites hosted with providers other than WP Engine and Flywheel are unable to use Local Connect.
Ready, Set, Deploy!
When it comes to moving a site from Local to a destination server, you’ve got a lot of options, a handful of which we outlined above.
In terms of automation, SFTP and a database manager is the least automated way to do a deployment, using a migration plugin affords you a little more automation, and deploying via Local Connect is the most automated, with a simple one-click push.
Ready to give it a try? Download Local for free!