


How to Block IP Addresses in WordPress
It’s a problem that nearly every website owner or administrator has faced. Your comments are being spammed, and nothing seems to keep the attackers at bay. Fortunately, there’s a secret weapon that can save your sanity and keep your comments clean: IP blocking.
An IP address is a unique identifier for every device on the web. It’s what computers use to communicate with each other. Blocking IP addresses can be an effective way to put a stop to malicious activity on your site.
In this article, we’ll walk you through the process of locating malicious IP addresses, blocking them from your site, and even blocking IPs from an entire country. Let’s get started!
Why Block an IP Address?
There are several reasons you might want to block unwanted IP addresses from visiting your website. Most of them involve protecting your site and its users from malicious activity.
Some of the most common reasons to block IPs include:
- Preventing spam. Spam comments can be a real problem for sites that allow them – when your comments section is filled with shady advertisements, it appears unprofessional. Blocking IP addresses prevents the malicious user from simply using a different account.
- Getting rid of bots. You may have commenters who aren’t necessarily spamming, but are still obviously bots or trolls. This can be especially problematic if your site has user forums. Blocking IPs can put a stop to this behavior quickly.
- Keeping unauthorized users out. You may want only certain authorized users to access a site, but you don’t want to require individual accounts. Restricting IP addresses to only those in a specific area can be an easy way to keep out unwanted visitors.
Now that you know why you might need to block an IP address, let’s take a look at how you can do so.
How to Block an IP Address?
An IP address is a unique identifier assigned to every device or network that connects to the internet. It functions similarly to a mailing address, telling servers where to send data so it can be displayed to users
By blocking an IP address from your site, you can prevent the device or network it’s assigned to from sending data back and forth between itself and your website.
It’s also possible to prevent an IP address from performing certain functions on your site, such as leaving comments, while still enabling it to access the rest of the site. We’ll cover all of these options in a moment.
How to Find Malicious IP Addresses in WordPress
Before you can block a problematic IP address, you’ll need to know which unwanted IP addresses are causing the problems. If the issue is a troublesome commenter, the process is easy enough.
WordPress automatically stores IP addresses for all users who leave a comment on your site. To see them, just head to your WordPress dashboard and click on Comments in the sidebar:
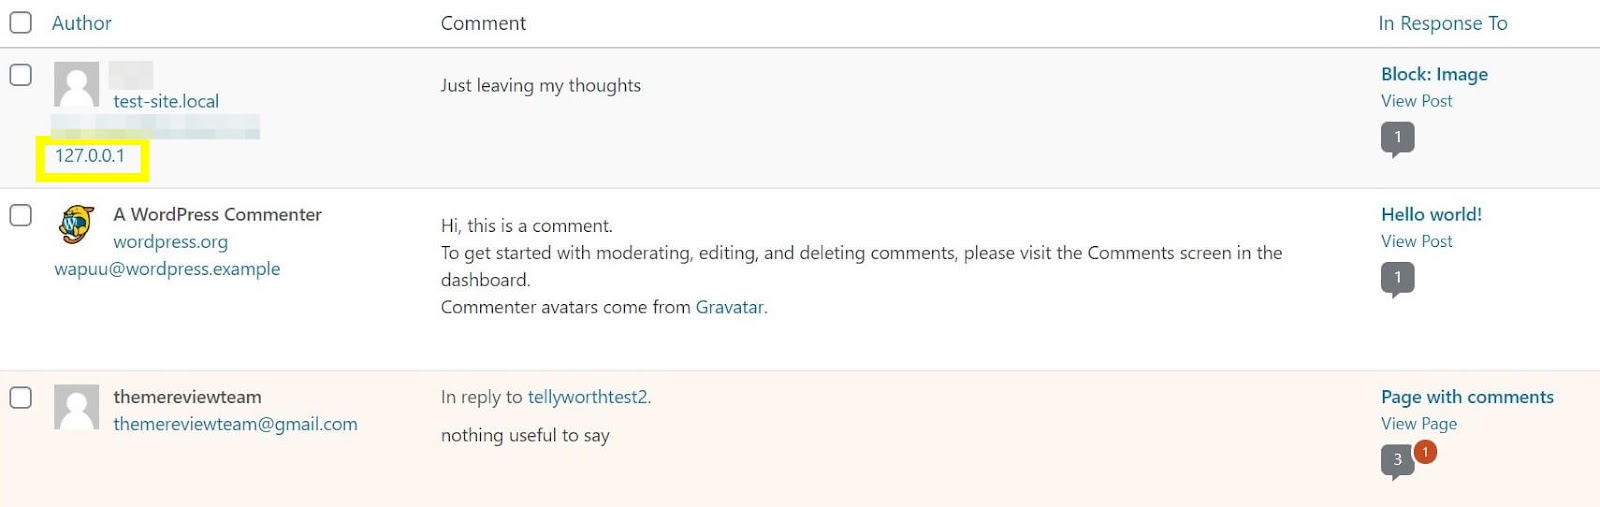
You can find the IP for each comment in the Author column, below the username and email address. Take note of the ones you want to block, so that you can enter them in the appropriate fields later.
Blocking IP Addresses in WordPress
Now that you have the IP addresses you want to block, it’s time to add them to a blocked list in WordPress. This is a three-step process: you’ll need to find the IP addresses, open up the Discussion settings panel, and enter the IPs into the Comments Blocklist.
Step 1: Designate IP Addresses
First, using one of the above methods, determine the IP addresses you need to block. From either the WordPress Comments page or your activity log, copy and paste the IPs you want to block into a separate document.
Using copy and paste is important here, as it prevents you from making typos that could block the wrong users. It’s even possible to accidentally block yourself from your own website, so it’s worth taking your time and being careful.
With your IP addresses copied, head to your WordPress dashboard and navigate to Settings > Discussion in the sidebar. This brings up all the comment settings for your site:

Scroll down to the Comment Blocklist section:
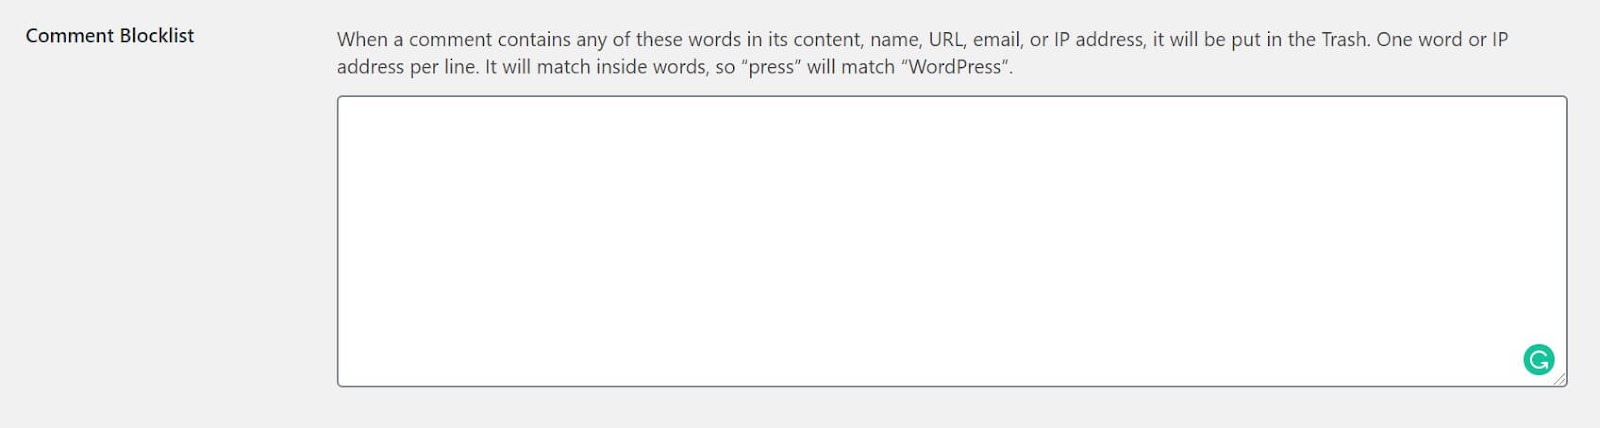
Here, you can enter any words, URLs, email addresses, or IP addresses you want to block from comments across your entire site. Comments posted that match any of the phrases or addresses in this box will be automatically sent to the trash.
Step 3: Copy and Paste IP Addresses
Now, pull up the document that contains the IP addresses you want to block, then copy and paste them into the Comment Blocklist. Make sure to only add one IP (or other phrase) per line:

When you’re done, scroll down and click on Save Changes. This will start blocking the indicated IPs immediately.
How to Block an Entire Country’s IP Addresses
In some cases, you may want to prevent all users from one or more countries from accessing your site. Your website may be designed for a specific locale, for example, or you may notice a large amount of malicious activity coming from a certain country. Fortunately, it’s possible to block all IPs from a given country using a WordPress plugin.
Step 1: Download the iQ Block Country Plugin
The plugin we’ll use is called iQ Block Country. Head to your WordPress dashboard, navigate to Plugins > Add New, and search for the plugin:
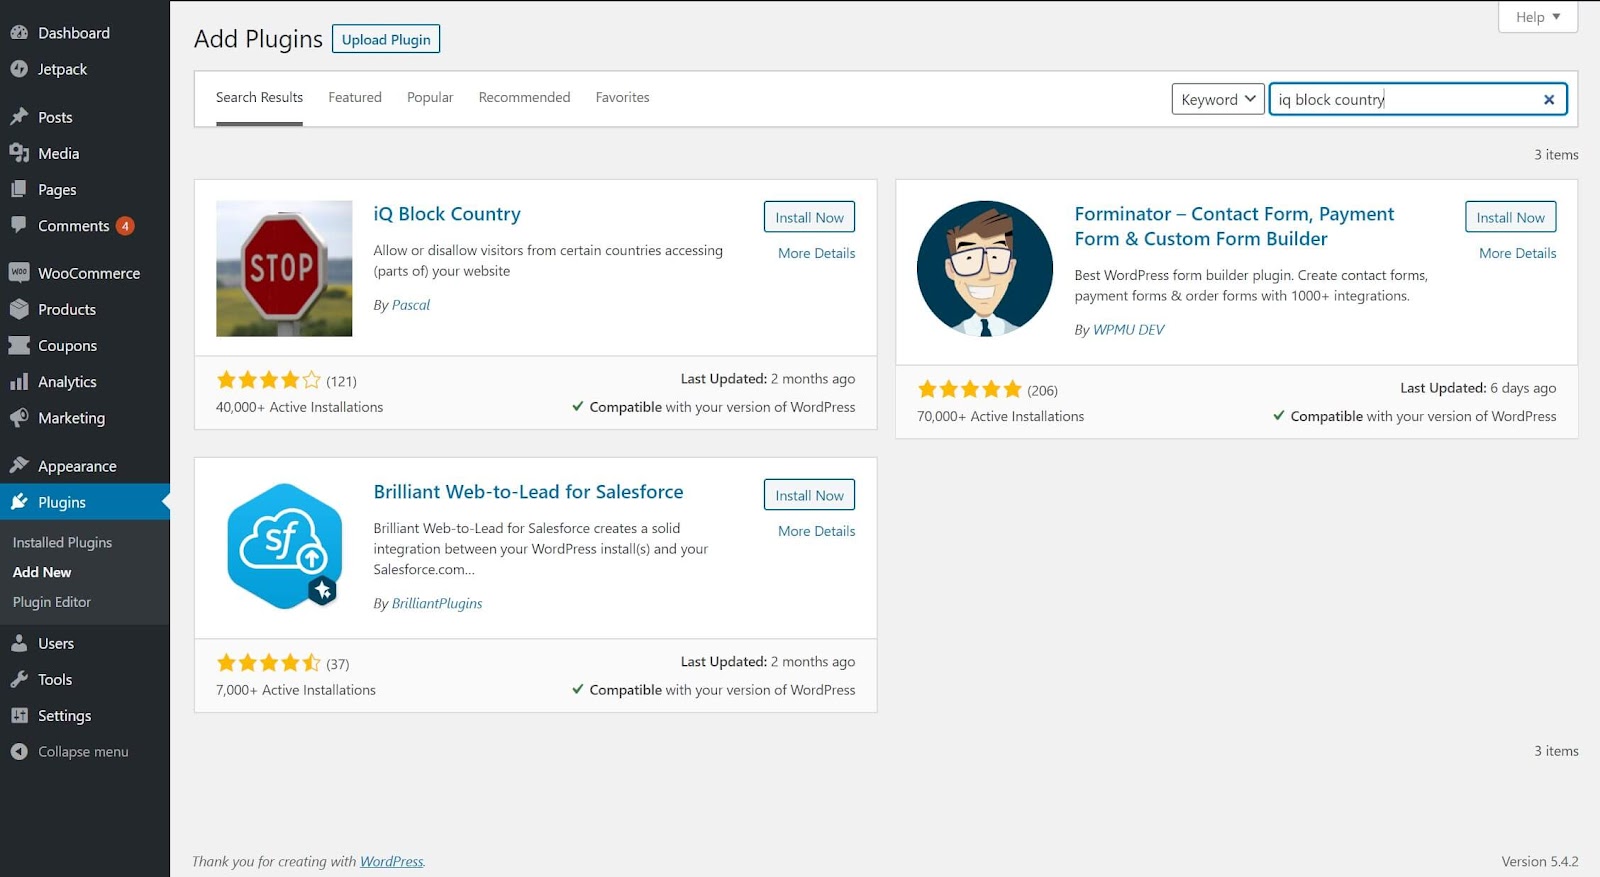
Once you’ve found it, click on Install Now and then Activate.
Step 2: Download the GeoLite2 Database
Once the plugin is installed, you’ll see a notification with instructions on how to get and upload a database file. We’ll cover how to use the free database here, but if you prefer to use the paid API, just follow the instructions in the notification.
To download the free GeoLite2 database, head to the MaxMind website and sign up for an account. Once you’ve completed the registration process and logged in, select Download Databases:

Then scroll down and download the GeoLite2 Country database.
Step 3: Upload the Database to Your WordPress Directory
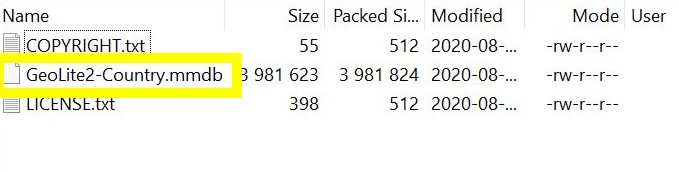
Once you have the database downloaded, go ahead and extract it (you may need a tool like 7-Zip if you’re on Windows). Copy the GeoLite2-Country.mmdb file:
Next, you’ll need to upload this file to the wp-content/uploads/ directory of your site. To do this, you’ll need to access your site’s files directly, using a Secure File Transfer Protocol (SFTP) client.
Step 4: Select the Countries You Want to Block
Now that the iQ Block Country plugin has a database to work with, you can tell it which countries to block. Then, it will automatically check the country of origin for any IP that visits your site, and block the ones from your specified regions.
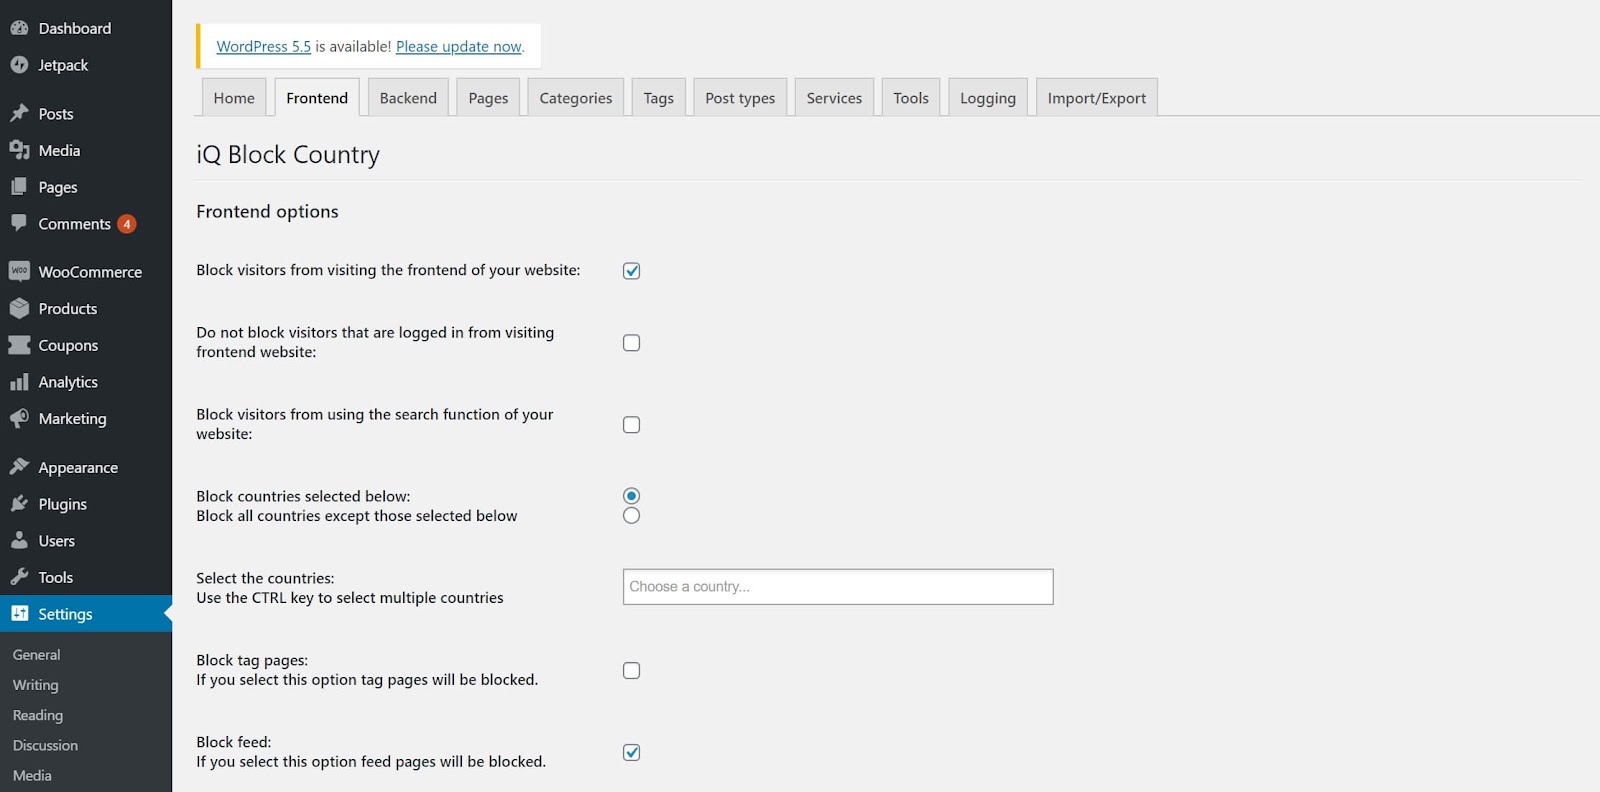
To do this, head back to the plugin’s settings page. You can choose to block visitors to the front end of your site, the back end, or both. To block users from the front end, select the Frontend tab:
In the Select the countries field, choose all countries you want to block traffic from using the drop-down menu:
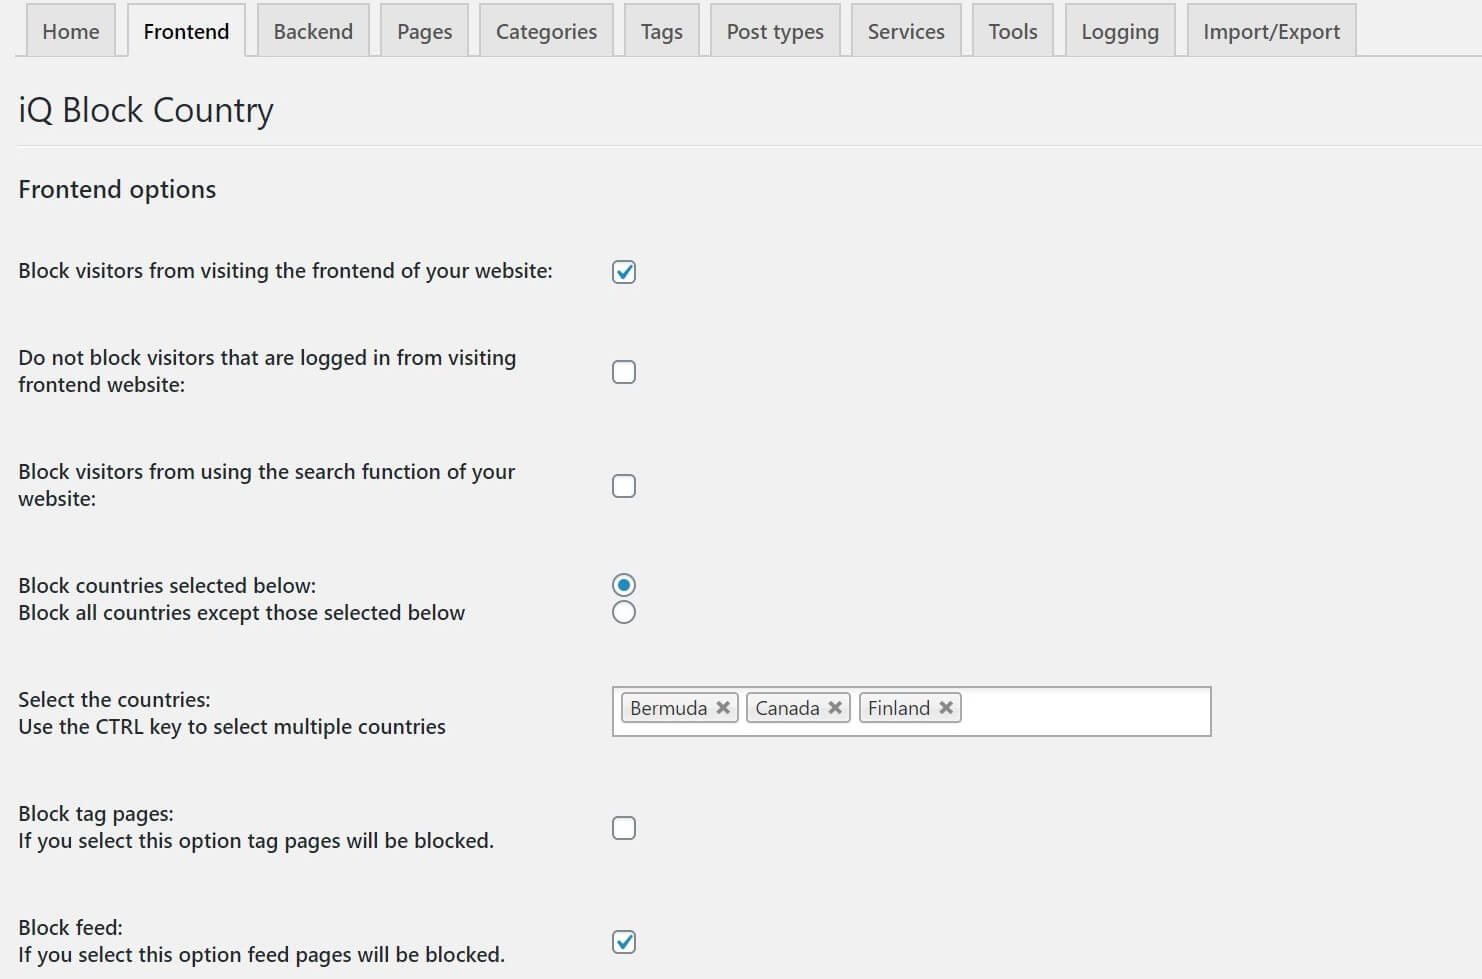
When you’re finished, scroll down and click on Save Changes. Now traffic from your selected countries will be unable to access your site.
There are a lot of options in the iQ Block Country plugin that enable you to customize who can view your site, so feel free to explore them all.
Do the Most With WP Engine
Whether your comments sections are bogged down with spam, or frequent unknown login attempts have you worried, blocking IP addresses can be an effective solution. If you need even more power, however, WP Engine can help.
We offer comprehensive developer resources, along with a variety of WordPress hosting plans to help you deliver an incredible digital experience for your users!