Get Started


Key Takeaways
Custom Post Types (CPTs) offer flexible content organization in WordPress. They allow creating new content types beyond traditional posts and pages, enhancing website customization.
ACF plugin simplifies CPT creation with custom fields. ACF provides over 30 field types for extensive site customization, reducing development time significantly.
Custom taxonomies enhance content organization. Creating custom taxonomies alongside CPTs allows for better categorization and organization of content, especially useful for niche websites.
Manual CPT creation via functions.php file requires caution. Editing functions.php directly can lead to CPT loss when changing themes, emphasizing the importance of backups and careful implementation.
Niche websites can sometimes have content organization needs that are not met by WordPress’ native post types. For that reason, you may have wondered if there are alternative options when it comes to organizing and displaying your content.
Fortunately, Custom Post Types (CPTs) are an option in WordPress that enables you to create a new kind of content and customize it however you like. This can be very helpful if you run a WordPress website that features content elements beyond the traditional posts and pages.
In this article, we’ll explain custom post types and their structures. Additionally, we’ll give you a walkthrough of how to create a WordPress custom post type both manually and using a WordPress plugin. If you’re ready, let’s get started!
What are custom post types?
Your WordPress database automatically creates a wp_posts table when you install the software on your web server. This table includes a post_type column, where the information we’ll be talking about is stored.
There’s several WordPress post types that you’ll likely be familiar with, including:
- Post: The traditional ‘blog’ WordPress post that appears in reverse chronological order, and can be assigned categories and tags.
- Page: These can be structured with parent-child relationships to create a hierarchy, but typically are not assigned categories.
- Nav Menu: A list of links that helps visitors navigate your website.
- Revision: These keep a log or history of changes to your other post types, in case you need to roll back to a previous version.
- Attachment: Any media you add to your posts or pages also gets stored as a WordPress post type, and your image or video file data is stored in the wp_postmeta table.
Additionally, WordPress includes two main taxonomy structures. Categories and tags are the primary way of assigning posts to different groups. While you can assign categories and tags to a CPT, you might find it necessary to also create custom taxonomies, in order to better organize your content.
One example of how this might apply is with products in an eCommerce store. You can create a ‘Products’ CPT with custom fields for information like pricing, quantity, and so on. Then, with a custom taxonomy you can create options for categorizing your products in just about any way you might imagine.
How to create a custom post type – plugin method (in 4 steps)
The easiest way to create CPTs is with a WordPress plugin. Let’s walk through how that process works.
Step 1: Download a dedicated plugin
For this example, we’ll use the free Advanced Custom Fields (ACF) plugin. ACF enables you to create CPTs, custom taxonomies, and includes more than 30 custom field types to fully customize your site.
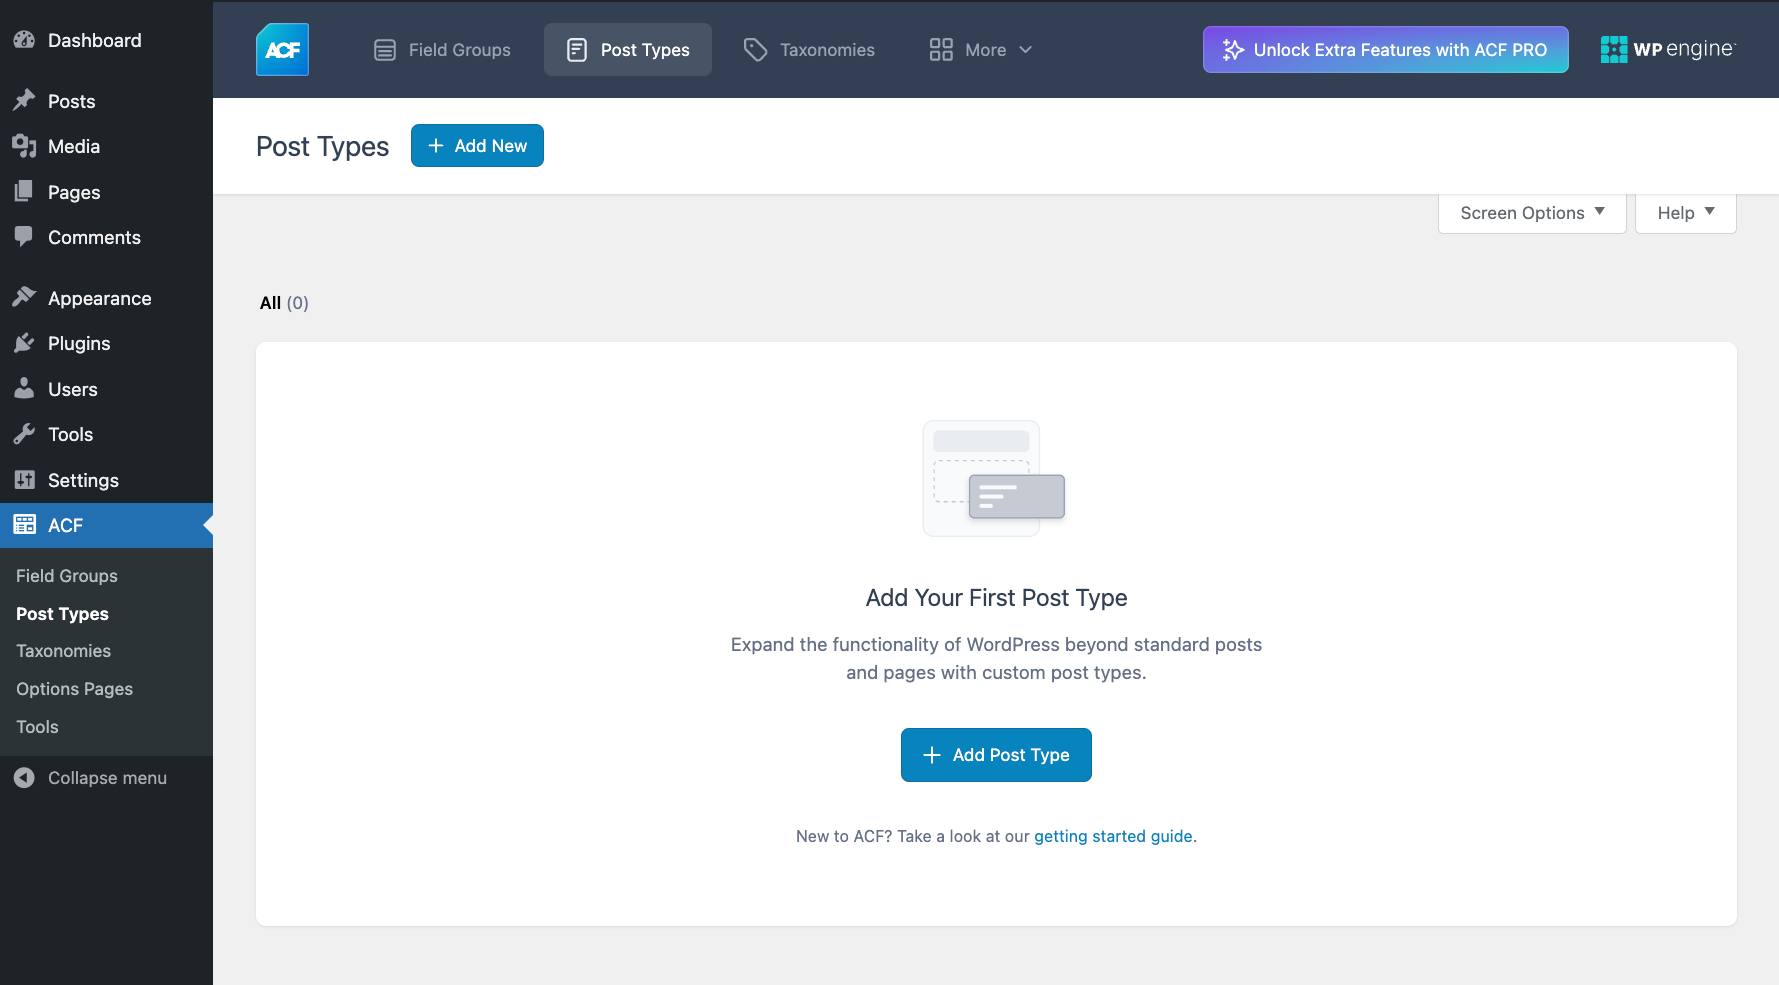
The first step is to download the latest version of ACF, and then install and activate the plugin. Once you’ve done that, head to the ACF Post Type screen in your WordPress dashboard:
Step 2: Add a new custom post type
Next, click Add New or Add Post Type. This screen will also show you any CPTs you’ve already created.
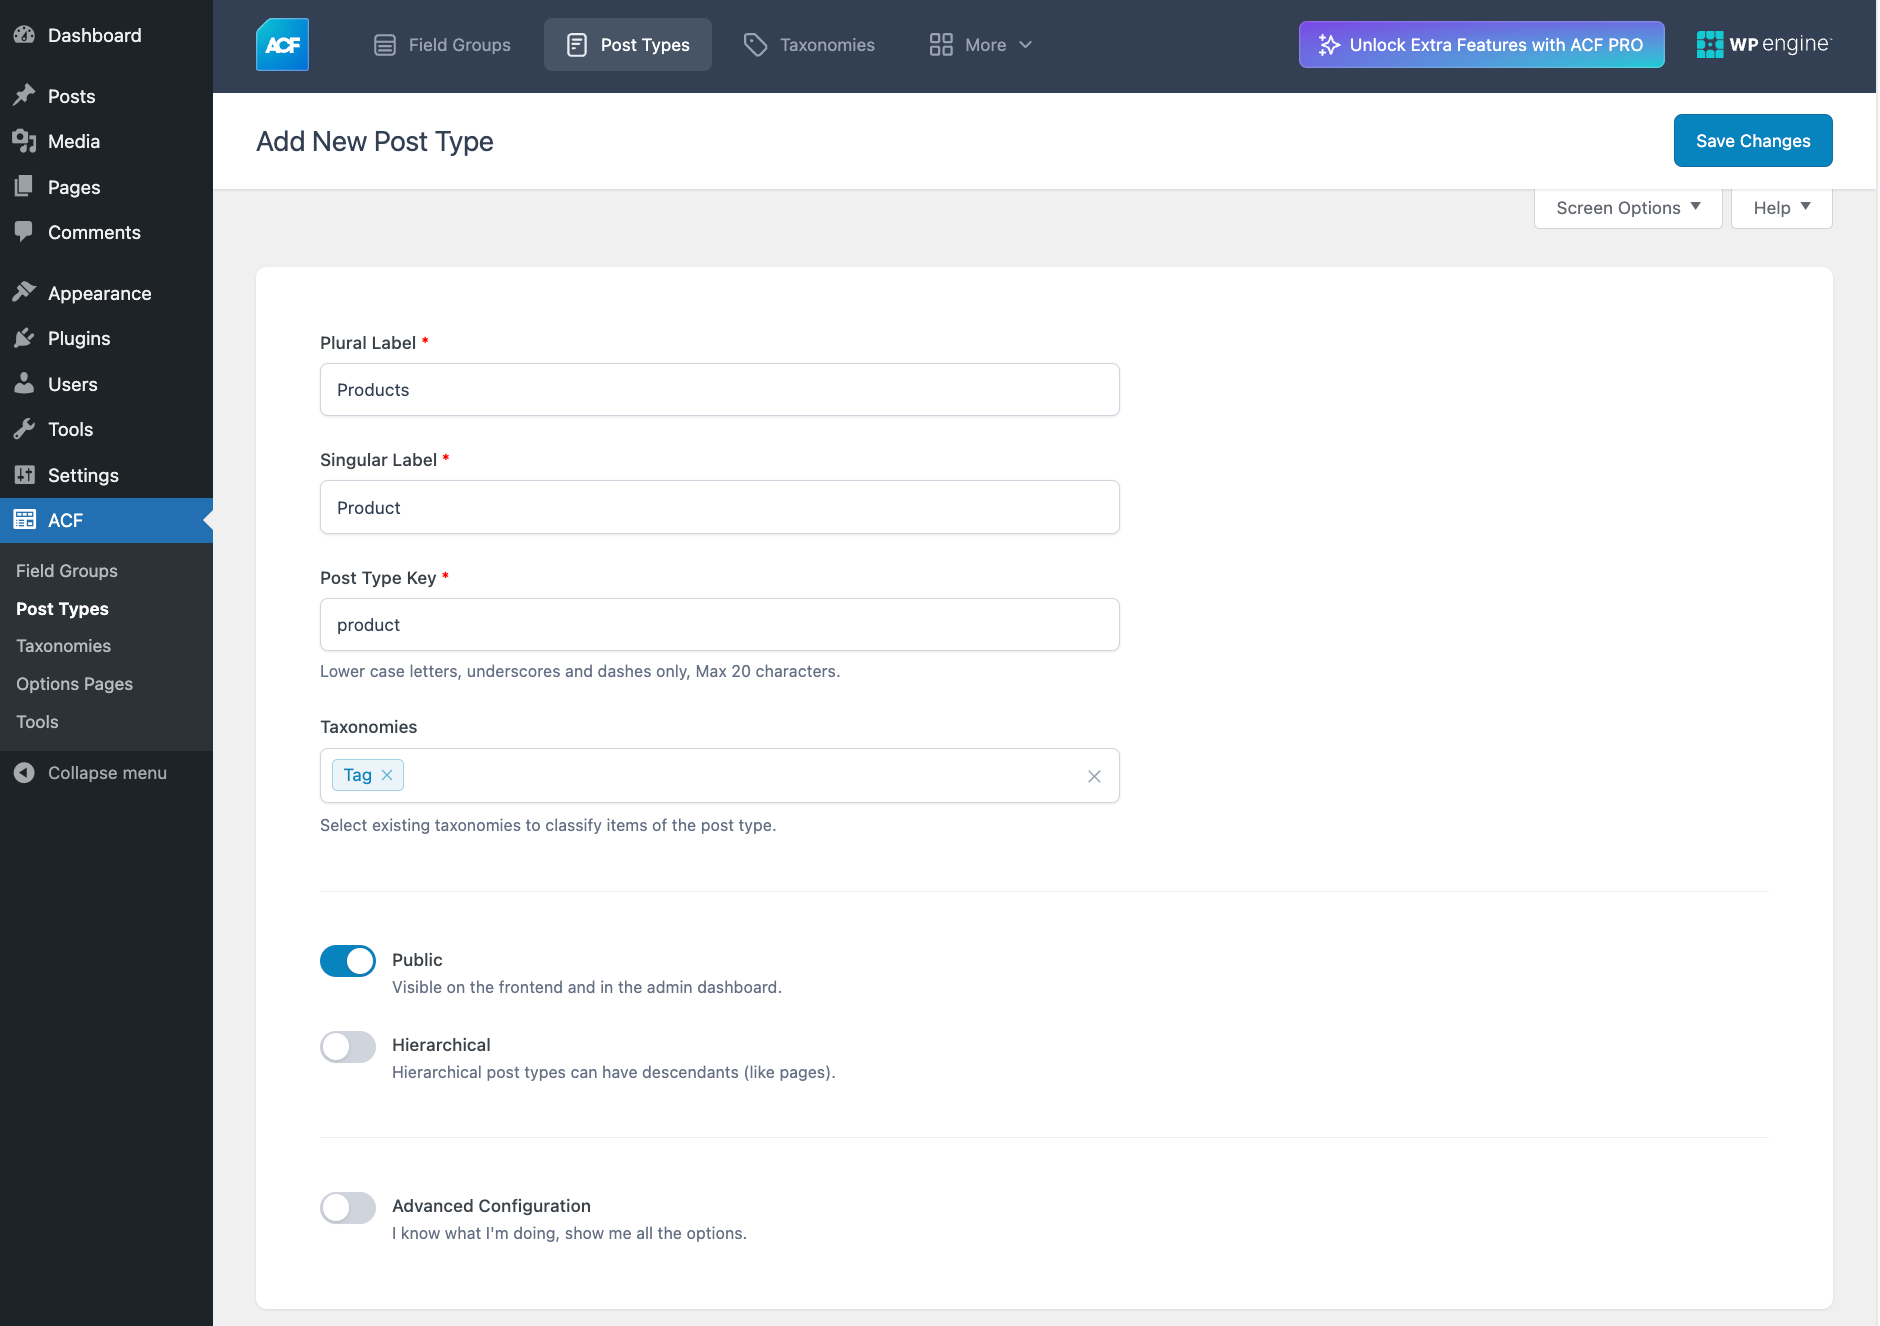
Step 3: Configure your new post type
Fill out the required fields for Plural Label, Single Label, and Post Type Key. Clicking in the Taxonomies field will open a dropdown menu where you can select one or more of the existing taxonomies on your site to classify your posts. You can add additional taxonomies to your CPT later if needed. Since we’re creating a CPT for products, it’s probably best to select both Categories and Tags. You may also want to create a new custom taxonomy to classify your posts.
There are also three toggle switches: Public, Hierarchical, and Advanced Configuration. “Public” is toggled on by default. Switching on “Hierarchical” means your CPT can have descendants, similar to how WordPress Pages operate. The “Advanced Configuration” toggle gives you fine-grained control over your CPTs settings. Please see the ACF documentation for more information on advanced configuration options for CPTs.
Click Save Changes to save your new custom post type.
Step 4: Create custom fields
ACF gives you a notification that the CPT has been created, including helpful links to add custom fields, link existing field groups, create another CPT, duplicate an existing post type, or create a custom taxonomy.
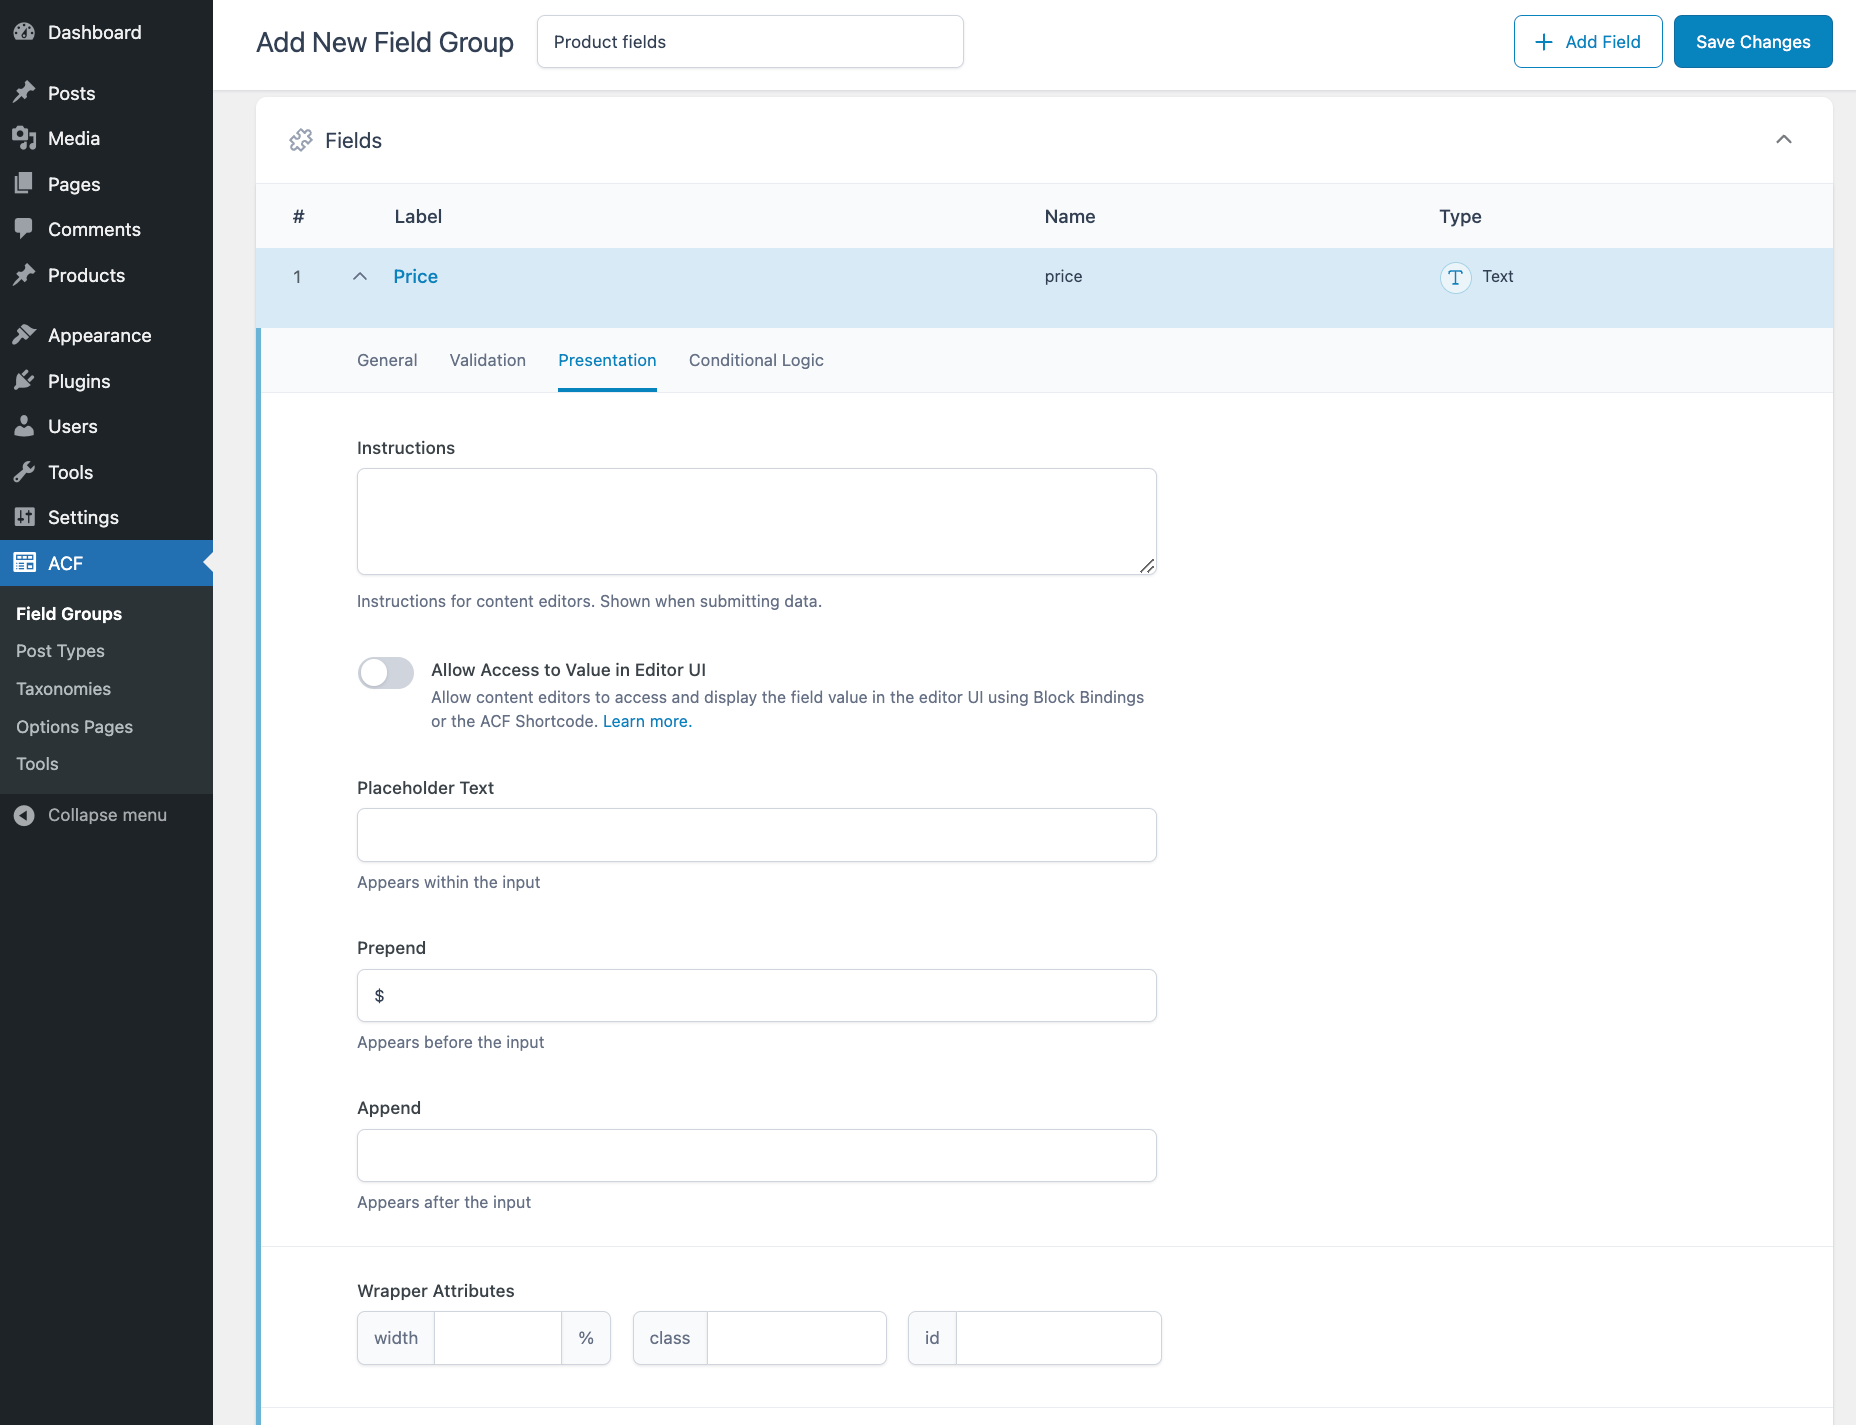
There’s practically no limit to the ways you can customize a CPT with ACF, but for now we’ll just add a single custom field for “Price.”
First, click Add fields in the ACF notification bar. This will take you to the ACF field group editor, where you can add your new custom field. Click the dropdown under “Field Type” and select Number. We could leave it as a text field, but using the Number field means content editors will be restricted to numerical values when entering data in this field. Fill in “Price” in the Field Label area, and ACF will automatically populate the Field Name section.
At this point, we could click Save Changes and our new field would be attached to our Products CPT. However, let’s take a moment to make life easier when we add new products. Click the Presentation tab under the Price field and enter a “$” in the Prepend area. This ensures someone entering new products on the site doesn’t have to remember to include the currency symbol.
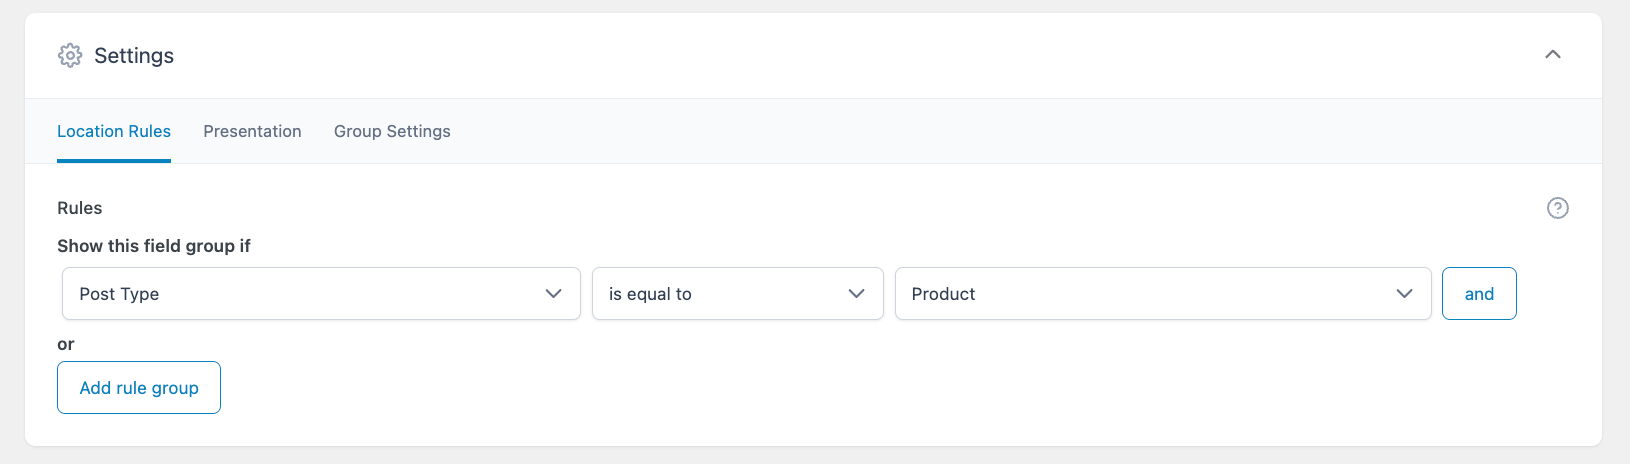
Next, scroll down to the field group’s settings. The first tab shows the Location Rules that govern where the custom field will appear. Because we created this field directly from the custom post type screen, It should automatically be set to appear when the post type is equal to “Products.” However, you can also set this manually, add additional post types where the field will appear, and so on.
Finally, click Save Changes and your new CPT will be ready to use with the custom “Price” field included.
How to create a custom post type – manual method (in 3 steps)
You can also create a CPT manually by editing your website’s functions.php file. We recommend making a copy of your file or backing up your site before starting.
Step 1: Locate and open your functions.php file
You can either access your site’s files through your web host’s file manager in your cPanel, or with a File Transfer Protocol (FTP) application like FileZilla. Once you’re connected you’ll navigate to your WordPress root folder, and then to wp-content > themes > your-theme.
It’s important to note that each theme has its own functions.php file. If you choose to use the manual process for creating CPTs, you’ll lose them if you change your WordPress theme. If you want to make sure your custom types are preserved no matter what, it’s best to use the plugin method instead.
Step 2: Insert custom post type code
The amount of detail you can include in a CPT is pretty vast. We’ll use a simple example to demonstrate how you can create a ‘Product’ CPT. You’ll see the same kinds of label options and settings that were available in the WordPress plugin settings earlier:
//* Create Custom Post Type
add_action( 'init', 'add_custom_post_type');
function add_custom_post_type()
{
     register_post_type( 'my_products',
           array(
               'labels' => array(
                    'name' => ‘Products’,
                    'singular_name' => ‘Product’,
                    'add_new'  => ‘Add New Product’,
                    'add_new_item' => ‘Add New Item’,
                    'edit_item' => 'Edit Product',
                    'new_item' => ‘New Product’,
               ),
               'public' => true,
               ‘has_archive => true,
               ‘rewrite’ => array(
                         ‘Slug’ => ‘products’
               ),
               'supports' => array(
                         'title',
                         'editor',
                         'author',
                         'thumbnail',
                         'excerpt',
                         'trackbacks',
                         'custom-fields',
                         'revisions',
                         'page-attributes'
               ),
          )
     );

}
You’ll want to add this code to the end of the functions.php file in your site’s theme folder. Of course, there are many more options that you can add in your CPT code as well, which can be found on resource sites like GitHub.
Step 3: Add your site’s text domain
If your site is translation ready and you want your CPT to be as well, you’ll need to locate your site’s text domain and make sure it’s included in the code you use for your CPT.
You can find your site’s text domain in the style.css file for your WordPress theme.
Once you open style.css, you will find “text domain” information in the file’s header.
You can then reference the text domain in your customizations. For example, in the “labels” array from the example code above, you would add your text domain after “Products” :
'name' => ‘Products’, ‘twentynineteen’,
You would add the text domain to all labels in your custom post type, in order to make it translatable.
Displaying custom post types on your site (2 methods)
Once you create your CPT, you have a couple of options when it comes to displaying them on your site. We’re going to cover two methods you can use.
1. Use a default archive template
One way to make sure your CPTs will appear on your site is by adjusting the code you use to create them. You can include the following string in your array:
‘has_archive’ => true,
Once you do this, your CPT will have its own archive page based on your theme’s archive page template. You can then access your new CPT archive page by using the URL www.yoursite.com/customposttype.
2. Display them on your front page
One of the benefits of creating CPTs is the ability to keep certain content separate from a regular blog post. If you want to make sure this content makes it onto your front page, however, you’ll need to add a small snippet of code to your theme’s functions.php file:
// Display Custom Post Types on home page, add to functions.php

    add_filter( 'pre_get_posts', 'my_get_posts' );

    function my_get_posts( $query ) {

        if ( is_home() && $query->is_main_query() )
            $query->set( 'post_type', array( 'products' ) );
//add cpt, in this case 'products' to array

        return $query;
    }
Naturally, you would also customize this snippet to include your CPT’s name and other key details.
Customize your site with WP Engine
Custom post types are a dynamic way for you to further customize your WordPress site, and deliver well-organized custom content types to your site’s visitors. Here at WP Engine, we offer the best resources for users and developers, and can help you create an incredible digital experience for your customers.
In order to develop a truly engaging digital experience, you need managed hosting for WordPress solutions tailored to meet your WordPress needs. Check out our innovative resources and hosting for WordPress plans today!