


Cloudflare Best Practices
Cloudflare is a cloud-based service that provides security features like SSL and DDoS protection, visibility into the traffic to your website, and scalability features such as CDN and page caching all from a DNS level. WP Engine recommends Cloudflare when configuring DNS because Cloudflare offers CNAME flattening for free.
Cloudflare and CNAME flattening
WP Engine recommends CNAME records for DNS – a CNAME allows you to point a domain (domain.com, blog.domain.com or www.domain.com) to another domain, instead of an IP address.
This allows you to point your domain to the WP Engine default URL (EX: environment.wpengine.com), which we then automatically configure to direct to the correct server environment. This method makes your DNS dynamic instead of static, removing the needs for any DNS updates if your site is migrated later.

If your website is ever migrated to new server hardware, the backend IP address will change. If you are pointing to WP Engine via CNAME, we manage the change for you automatically on the backend and thus no DNS updates would need to be made by you.

Some users choose to point directly to an IP address (via an A record).
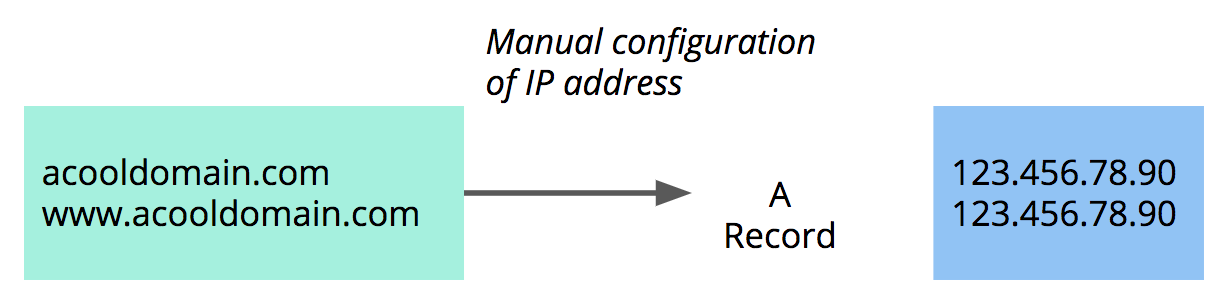
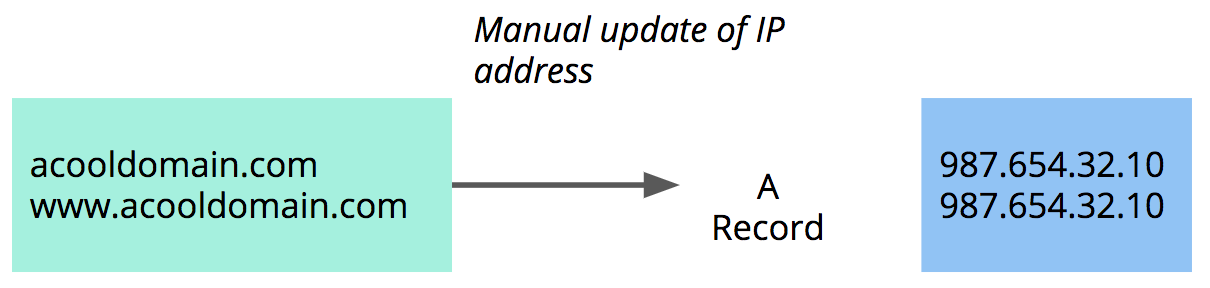
If you choose to point to an IP address directly, you will need to manually update this record anytime WP Engine migrates you to new, more efficient server hardware.
CNAME records help ensure you don’t have to make updates in case of a server migration. Trouble is, most DNS registrars do not offer the ability to configure a CNAME record for your root domain (domain.com), only for your “www” record (www.domain.com). This is why CNAME flattening through Cloudflare is attractive. Cloudflare offers free plans that support CNAME flattening, in addition to powerful features like SSL, CDN, and more.
Head to our guide, Configuring DNS for WP Engine for a guide on DNS records, as well as links to guides for configuring DNS for the most widely-used DNS registrars.
Cloudflare and SSL/TLS
Cloudflare offers several SSL/TLS options for encrypting any user data entered on your website. However, WP Engine also offers free Let’s Encrypt SSL/TLS certificates for your website. In this section we will explain how to configure your SSL/TLS settings in Cloudflare in a way that will not interfere with your WP Engine settings.
Cloudflare Universal SSLs can take up to 24 hours to activate. Cloudflare dedicated/paid SSL offerings will be active immediately. We advise first confirming the SSL is available through Cloudflare before changing your nameservers to Cloudflare.
Check if Cloudflare SSL is Active
- Login to the Cloudflare dashboard
- Click SSL/TLS
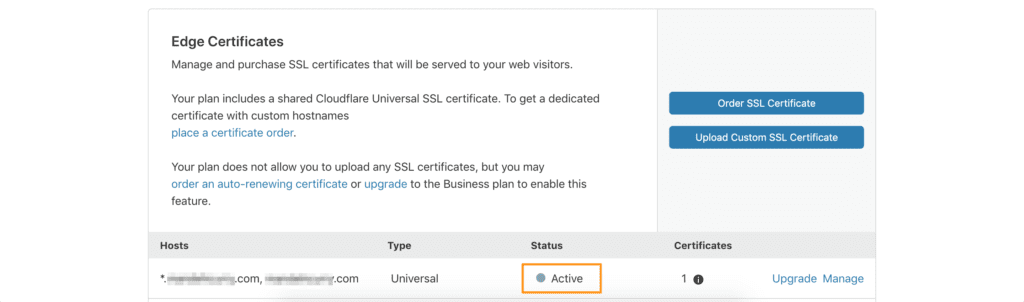
- Click Edge Certificates
- Verify the certificate status next to your domain reads Active
Check if WP Engine SSL is Active
Now that you’ve confirmed Cloudflare has an SSL available, determine your current SSL status with WP Engine. This will help prevent many issues that can cause conflicts and errors.
- Login to the User Portal
- Click on the environment name you wish to view the SSL status of
- Click SSL
- You do not have an SSL installed on WP Engine if you do not see the domain listed, or if see a page prompting you to add certificates.
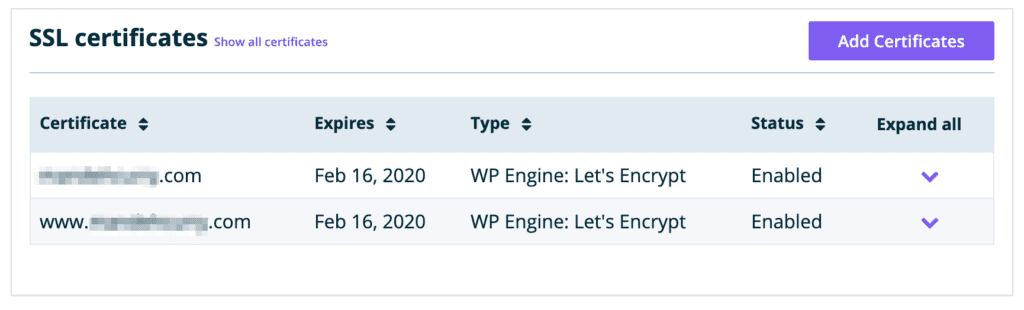
- You do have an SSL installed on WP Engine if you see your domain listed similarly to the following image.
If you do not have an SSL certificate with WP Engine
If you have not added a WP Engine SSL or installed a 3rd-party SSL certificate through the WP Engine User Portal, you can use the following 2 SSL options in Cloudflare:
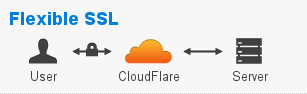
1. Flexible
This option is available on the free Cloudflare plan.
- Traffic is encrypted between the browser and Cloudflare.
- Traffic is not encrypted between Cloudflare and WP Engine.
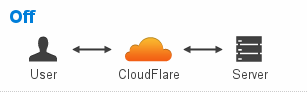
2. Off
Only use if you wish to encrypt no user data and access your website only at http:// and not https://
- Traffic is not encrypted between the browser and Cloudflare.
- Traffic is not encrypted between Cloudflare and WP Engine.
NOTE
WP Engine does not support “Authenticated Origin Pulls”. Please ensure this setting remains set to the default “Disabled” within Cloudflare.
If you do have an SSL certificate with WP Engine
If you have added a WP Engine SSL or 3rd-party SSL certificate through the WP Engine User Portal, you may use the following SSL 3 options from Cloudflare.
NOTE
We DO NOT advise setting Cloudflare SSL to OFF (not secure) as this will prevent WP Engine SSL from working.
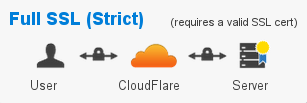
1. Full (Strict)
- Traffic is encrypted between the browser and Cloudflare.
- Traffic is encrypted between Cloudflare and WP Engine.
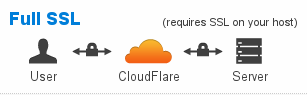
2. Full
This option is the same as Full (Strict) in that it requires an SSL to be installed at WP Engine, but it allows users to bypass the authenticity check of the SSL certificate. This option should only be used if you have a self-signed or otherwise invalid SSL certificate installed via WP Engine.
- Traffic is encrypted between the browser and Cloudflare.
- Traffic may or may not be correctly encrypted between Cloudflare and WP Engine.
3. Strict (SSL-Only Origin Pull)
This option is only available for Enterprise-level plans with Cloudflare.
- Traffic is encrypted between the browser and Cloudflare.
- Traffic is encrypted between Cloudflare and WP Engine.
- Optionally allows redirecting HTTP requests to HTTPS, when HTTP is requested.
Paid Cloudflare SSL
Cloudflare also offers the option to purchase a “Dedicated SSL” for all plans. This SSL certificate will encrypt the connection between your end user and Cloudflare, but offers a better experience by showing your own domain instead of a default Cloudflare domain.
Once your Cloudflare Dedicated SSL certificate has been purchased, you will have the same configuration options described in the sections above.
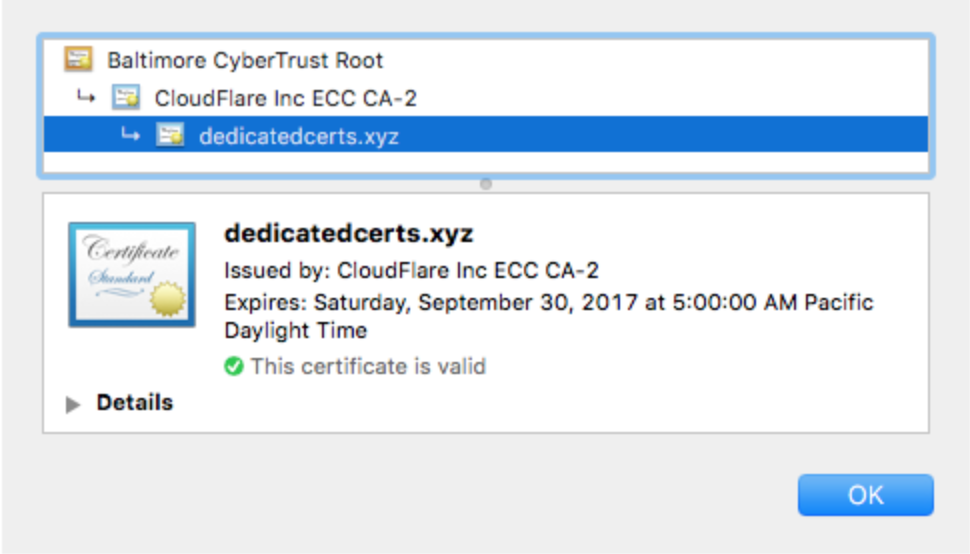
With Cloudflare free Universal SSL, your certificate appears like this:

With Cloudflare Dedicated SSL, your certificate will appear like this:
Display WP Engine SSL Instead of Cloudflare
If you want your WP Engine SSL certificate to appear instead, you will need to use Cloudflare in “pass-through” mode. This means you will forego the CDN services of Cloudflare and use it only as a CNAME flattening DNS service.
- Login to the Cloudflare dashboard
- Click DNS
- Click the orange cloud icons next to your domain in the Proxy status column

- The cloud should turn grey and the Proxy status will read DNS only

Custom SSL Certificate on Cloudflare
If you wish to upload your own SSL certificate to Cloudflare (such as an SSL purchased through a 3rd-party certificate provider) this requires a Business-level plan with Cloudflare. With this method you can also upload the same certificate to WP Engine (requires Growth plan or higher).
Troubleshoot Cloudflare SSL
You may encounter issues such as errors or redirect loops if your Cloudflare SSL settings are not configured correctly. Be sure to refer to the above options for guidance when configuring your Cloudflare SSL.
If you experience further issues, look to Cloudflare’s SSL troubleshooting article for more steps.
Cloudflare CDN
A CDN (Content Delivery Network) helps serve a global audience more quickly by caching a copy of large media assets on servers physically closer to visitors. Cloudflare includes CDN services for static files like images, JavaScript, and CSS.
Cloudflare is a “zero configuration” CDN, meaning it is automatically enabled when you activate Cloudflare at any level. Additionally, because the CDN is active at the DNS level, there will be no custom CDN URL to rewrite assets to.
Cloudflare Performance Options
Cloudflare has a suite of features available to help improve your website’s speed under the “Speed” tab. In this section we will cover explain how Cloudflare speed options work with WP Engine.
Auto Minification
Minification is the practice of removing extra white spaces, comments, and line breaks that make your code more readable for developers, in order to make it easier and faster for a web browser to interpret. Auto minification will minify HTML, CSS, and JavaScript files by default. Keep in mind, auto minification cannot minify files from third-party domains (such as your Google Analytics script), and will not minify files that already have .min in the file name.
While auto minification has not been known to cause conflicts with WP Engine, keep in mind that optimization plugins like Autoptimize or BWP Minify may already be combining and minifying your files for you. When Cloudflare encounters these files, it skips auto-minification because the files are already minified.
Railgun
Railgun is a service which compresses the web pages dynamically generated on your origin server. WP Engine does not support the use of Railgun at this time. The service is unsupported because installation requires opening a port and installing the railgun service on our servers.
Rocket Loader
Cloudflare’s Rocket Loader script bundles JavaScript files together so that web browsers can receive all JavaScript files with a single HTTP request. It also asynchronously loads JavaScript files so they do not block the rendering of your page (also known as “Defer the Parsing of JavaScript”). You can select “Automatic” optimization, meaning all scripts will be loaded asynchronously. Or, select “Manual” to self-select which scripts should be optimized and which should load as-is.
Rocket Loader has no known conflicts with the WP Engine platform itself, but it is important to be aware that some scripts may not work properly when loaded asynchronously. If you enable this setting and notice odd behavior on your website, try “Manual” configuration instead. If you are still unable to get a working configuration manually, using Autoptimize or BWP Minify for asynchronous loading of JavaScript may work better.
You will see the Rocket Loader script when viewing the source code of your web page like so:
<script type="text/rocketscript" data-rocketsrc="https://mydomain.com/wp-includes/js/jquery/jquery.js?ver=1.12.4">
Cloudflare Cache
Cloudflare caches your website’s static files by default on its network of edge servers. This helps deliver your website content to your visitors around the world quickly, by serving them the assets from the edge server closest to them.
In Cloudflare, the default cache setting is called Standard. With this setting Cloudflare will hold each web page in cache for 10 minutes (using WP Engine’s cache expiration headers) and static files for 30 days.
Cloudflare also has an “Edge Cache expires TTL,” meaning it will only look for new content to cache from WP Engine when the edge cache expires. For the free plan tier, the default “Edge Cache expires TTL” is 2 hours, while other Cloudflare plans have lower expires TTL options.
For more information on Page Rules including caching options, check out Cloudflare’s page rules tutorial.If you have made changes to a page or added a new resource and are not seeing the change within 10 minutes, try purging the WP Engine cache first. If this does not help, try purging the Cloudflare cache.
NOTE
To rule out conflicts with Cloudflare altogether, try using a Host File Trick to view your website directly from WP Engine’s servers.
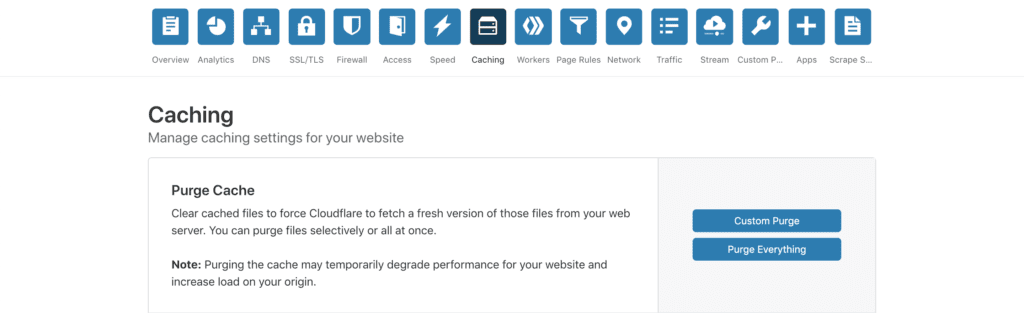
Purge Cloudflare Cache
- Login to Cloudflare
- Select Caching
- Click Purge Everything
NOTE
For even easier access, purge Cloudflare’s cache directly from your WordPress admin dashboard with the Cloudflare plugin for WordPress.
Development Mode
If you are testing file or page changes, or troubleshooting errors, placing Cloudflare in Development Mode can be an easy way to determine the source of the issue. Development Mode enables “pass-through” mode on Cloudflare, meaning it simply passes all requests on to your origin server (WP Engine).
The Development Mode setting will bypass Cloudflare’s cache for 3 hours, before turning the setting off again automatically.
If you are experiencing an issue that goes away when Cloudflare Development mode is on, this indicates an issue with a Cloudflare setting or Cloudflare caching.
Enable Development Mode
- Login to Cloudflare
- Select Caching
- Toggle Development Mode to On
NOTE
Development Mode does not purge edge cache. As a best practice you should enable Development Mode and purge edge cache when troubleshooting.
Cloudflare DDoS Mitigation
Cloudflare’s platform offers some key security benefits as well. In particular, when pointing your nameservers to Cloudflare, you are obscuring the origin IP address (the IP address of your WP Engine server) from bad actors. This means they cannot target the source of your website’s content in a DDoS (distributed denial of service) attack.
DDoS attacks are targeted attacks intended to take down your website by flooding it with bad requests. By nature, Cloudflare obscures your origin IP with any plan, which is a good step to prevent DDoS attacks. However, Cloudflare has additional settings you can enable to help mitigate a DDoS should you encounter this scenario.
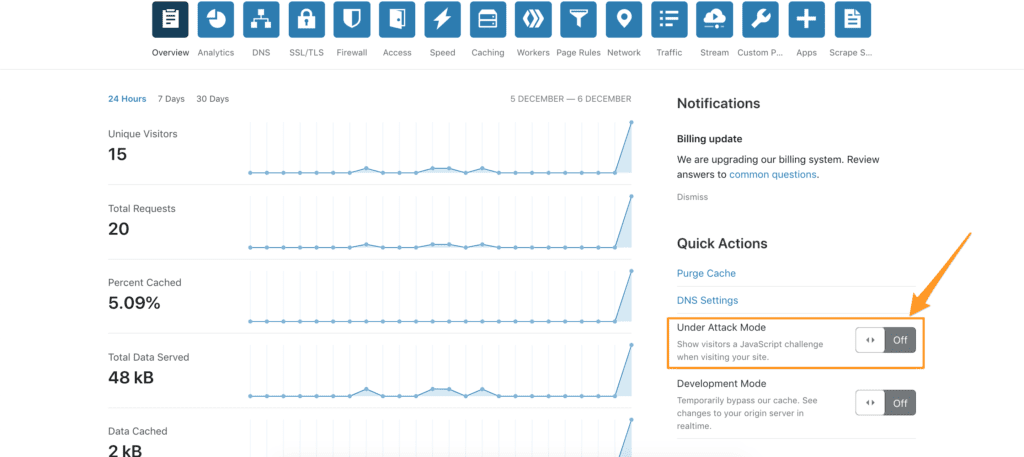
Enable “Under Attack” Mode
Once enabled, users will see an intermediary page while their validity is verified by Cloudflare for a brief few seconds using JavaScript, before continuing to your website. This allows Cloudflare to sort out the bad actors and only allow real visitors through to your website.
- Login to Cloudflare
- Select Overview
- Toggle Under Attack Mode to On
Enable Cloudflare During an Attack
It is far easier to use Cloudflare from the start as a preventative solution to DDoS attacks, than it is to try to implement DDoS protection while currently under attack. We recommend pointing your Nameservers to Cloudflare when initially configuring your DNS, for easy mitigation of DDoS if ever needed.
If you are not pointed to Cloudflare and your site comes under attack, DNS can still be routed through Cloudflare and under attack mode can be enabled. Bear in mind, however, that attackers likely have already located your origin server IP so reaching out to WP Engine Support is a good idea to deny attackers at a server-level.
Check out Cloudflare’s full guide for responding to a DDoS attack.
Other Traffic Solutions
Beyond mitigating DDoS from many vectors, Cloudflare also allows you more granular control over your website’s visitors and uptime.
Always Online
Found in the “Caching” page of the Cloudflare dashboard. This feature allows Cloudflare to serve a cached version of your website even in the event of downtime, or errors. The “always online” feature is enabled by default, but may be turned off if you wish.
Firewall access rules and User Agent denying
Configured from the “Firewall” page in the Cloudflare dashboard. These rules can be used to deny known bad IP addresses, countries, and user-agents, or to allow known good IP addresses, countries, and user agents.
Challenge Passage
Configured under “Firewall” page in the Cloudflare dashboard. Controls how long a JavaScript challenge is accepted. After the allowed window of time, users will be challenged again.
Threat Analytics
Found in the “Analytics” page of the Cloudflare dashboard. This page will help you determine how often threats are detected, from which IP addresses and countries the threats originated, and how the above settings are performing against these threats. Learn more about Cloudflare analytics.
Cloudflare WordPress Plugin
Cloudflare offers a WordPress plugin with easy one-click configuration settings for WordPress. It also includes and easily accessible option to purge Cloudflare cache directly from your WordPress site.
Additionally, you will be able to configure WAF settings if you have a paid Cloudflare plan (Pro and higher). Within your WordPress Admin Dashboard you can also edit cache settings, security level, and “always online.” Last, you have the ability to view your website analytics like threat detection, bandwidth, and more directly through the Cloudflare plugin.
After installing the plugin, select the Optimize Cloudflare for WordPress option to enable the following settings automatically:
| Setting | Value |
| Security level | Medium |
| Caching level | Standard |
| Auto Minify | Enable Auto Minify for JS, CSS, and HTML |
| Browser Cache Expiration | 4 hours |
| Always Online | On |
| Development Mode | Disabled |
| IPV6 Compatibility | Off |
| WebSockets | On |
| IP Geolocation | On |
| Email Address Obfuscation | On |
| Server-side Excludes | On |
| Hotlink Protection | Off |
| Image optimization (Polish and Mirage) | Off (unless on Pro or higher plan) |
| Rocket Loader | Off |
NEXT STEP: Let WP Engine manage your Cloudflare security and performance settings with Global Edge Security