


Offload Media to Amazon S3 with LargeFS
LargeFS (Large Files System) is a product created by WP Engine, designed to store and transfer virtually unlimited amounts of data and integrate it into the familiar WordPress experience. It is especially useful if you need to use large amounts of media on your website and can help reduce local storage usage.
The WP Engine LargeFS service to offload content is a free feature included with all WP Engine plan levels and does not require purchasing any extra plan add-ons. However, an S3 bucket must be purchased and paid for with Amazon, and their pricing may vary.
Additionally, only media (such as images or stylesheets) and server logs can be offloaded using LargeFS. The website’s database and backups cannot be offloaded using LargeFS.
For more information on what LargeFS is, read our announcement post, Unlimited Storage with WP Engine’s Proprietary LargeFS.
LargeFS Configuration Steps
Setting up LargeFS to automatically offload your media to Amazon S3 consists of four steps:
- Create bucket
- Grant WP Engine access
- Make the bucket readable
- Provide the bucket to WP Engine Support to enable LargeFS
NOTE: If you want to use LargeFS for multiple sites on the same account, you do not necessarily need to use separate buckets for each website. Be sure to let our Support team know which sites will be using which bucket in the final step.
Create Bucket
Next, log in to AWS and create the bucket WP Engine will use:
- Log in to the AWS console:
- Select Services near the top
- Click Storage
- Select S3

- Click Create Bucket
- Under General configuration:
- Fill in a Bucket name
- Select your AWS region – Remember this! You will need to provide this later to WP Engine Support
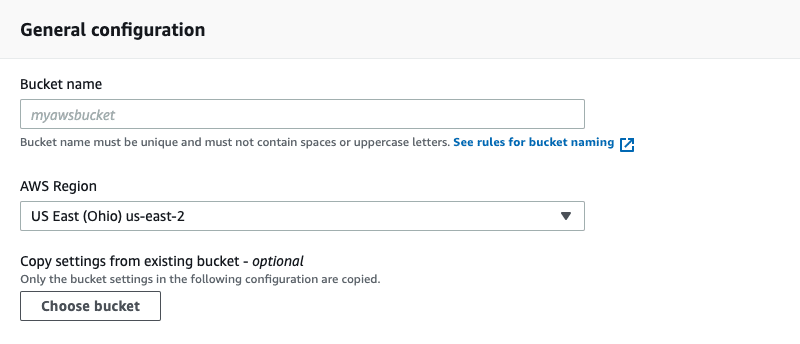
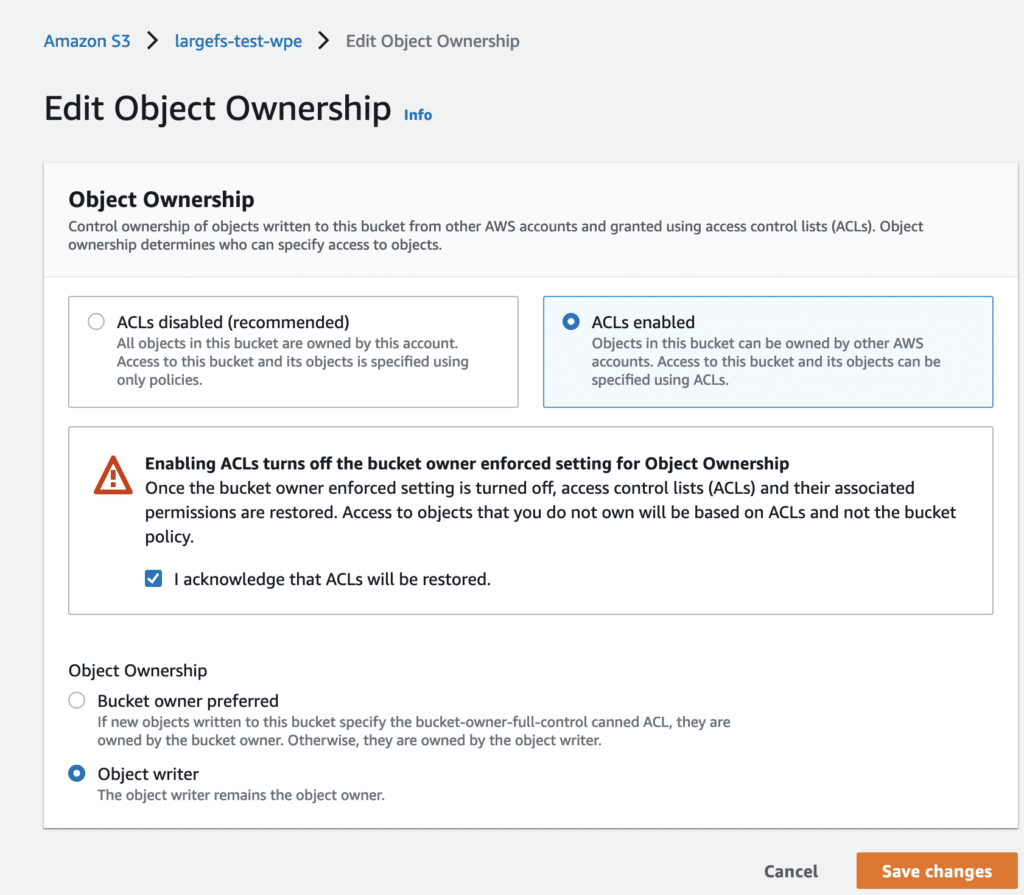
- Under Object Ownership, click Edit

- The following items must be selected to ensure WP Engine can write to your new bucket:
- Select ACLs Enabled
- Under Object Ownership, select Object Writer
- Click Edit for Bucket settings for Block Public Access
- Uncheck Block all public access
- This should also deselect all four items in the tree.
- Add a check in the acknowledgement box.

- Scroll to the bottom and click Create bucket
Give WP Engine Access
Next you need to assign the required permissions to the bucket, so that WP Engine’s Large FS service can begin placing files in the bucket. These permissions grant our WP Engine LargeFS user the rights to read and write objects in your bucket on your behalf.
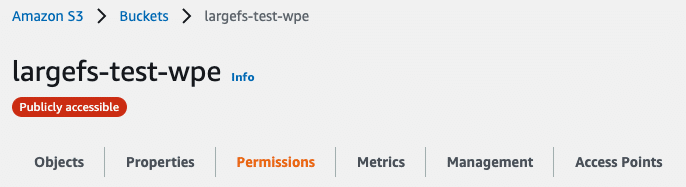
- Find and select the bucket you just created in the list of buckets
- Click Permissions
- Scroll to the Bucket Policy box and click edit.
- In the Bucket policy editor window, replace the existing content with the policy provided below.
- In this excerpt, there are 3 placeholders that say your-bucket-name, replace them with the bucket name you just created.
- Be sure to keep the surrounding characters intact when replacing the placeholder text.
- Click Save changes once done.
Bucket Policy:
{
"Version": "2008-10-17",
"Statement": [
{
"Sid": "AllowLargeFSUploads",
"Effect": "Allow",
"Principal": {
"AWS": "arn:aws:iam::902500896138:user/wpengine-largefs"
},
"Action": [
"s3:ListBucket",
"s3:GetObject",
"s3:PutObject"
],
"Resource": [
"arn:aws:s3:::your-bucket-name",
"arn:aws:s3:::your-bucket-name/*"
]
},
{
"Sid":"PublicReadGetObject",
"Effect":"Allow",
"Principal": "*",
"Action":["s3:GetObject"],
"Resource":[
"arn:aws:s3:::your-bucket-name/*"
]
}
]
}
Make Bucket Readable
Next, make the bucket readable. These policy and settings make your bucket world-readable, so that when WP Engine goes to retrieve your files from the bucket, it does so as if it was a user on the internet.
- Click Properties
- Scroll to the Static Website Hosting box and click Edit
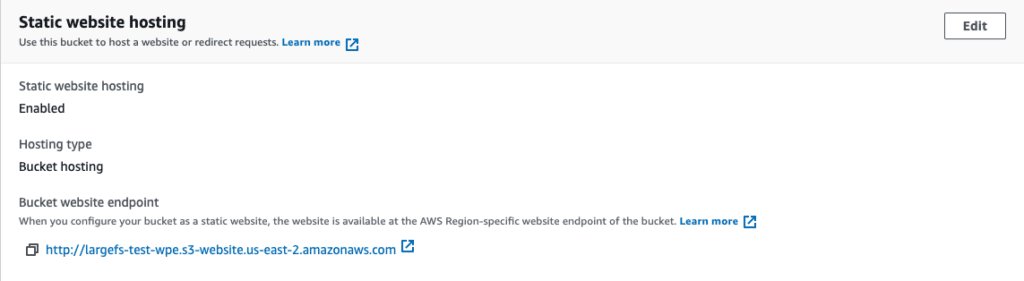
- Locate Static Website Hosting and click Enable
- In the Index Document box enter index.html
- Click Save changes
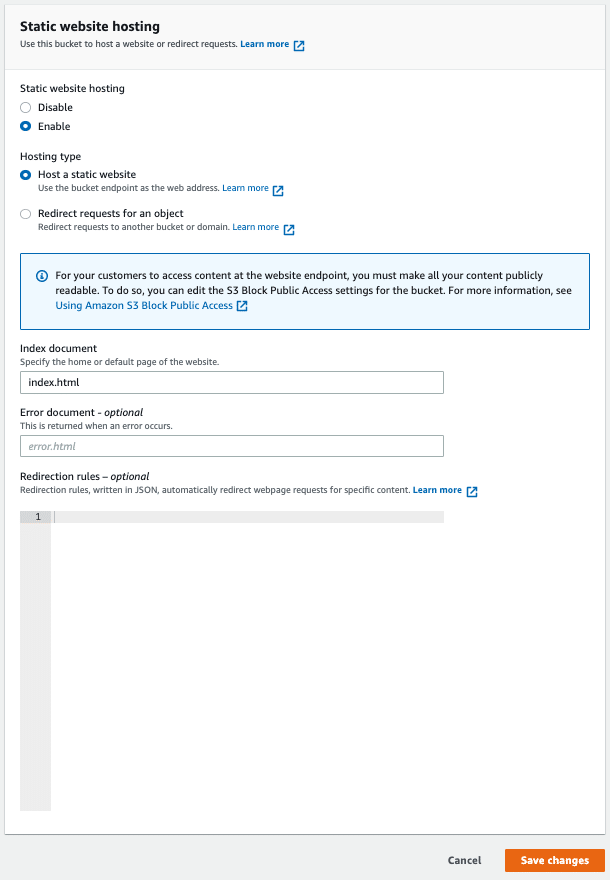
It will take some time for AWS to propagate permissions from here.
NOTE
As the bucket is now public, never store any non-public files in the bucket. Best practice is to not store any files in the bucket that are not managed by LargeFS.
Provide Bucket to Support
Finally, contact WP Engine Support to have the bucket added to the environment and to finish activating LargeFS.
- Contact Support so we can place your bucket information on the server and trigger the media offload service. Provide the following with your request:
- Name of the environment using LargeFS
- Bucket name
- Bucket region
- Path
- The default path is
/wp-content/uploads/ - Any file or directory path where you keep media can be used
- Multiple paths can be included
- File/directory paths can be included or excluded
- The default path is
- Download the LargeFS validation file the Support technician will provide.
- This file will be titled with a random string and end in the
.largefsfile extension, ex:123abc.largefs - It’s important to upload this file exactly as provided, do not add
.txt,.doc,.htmlor any other file extension.
- This file will be titled with a random string and end in the
- Go back to your S3 bucket and select the Objects tab.

- Click the Upload button.
- Click the Add Files button.
- Select and upload the .largefs file you were provided.

- Let the Support technician know the file has been uploaded so we can validate the connection.
Once this process is completed, our system will start copying over files from your local /wp-content/uploads/ to your new Amazon S3 bucket.
We will continue to regularly move new files that are over 10 days old to this bucket.
Backup Logs to Amazon S3
LargeFS can also be configured to automatically offload your Nginx website’s access and error logs be stored to your own S3 bucket. This feature allows you to maintain your log files as long as you wish, and access them without needing to login to your website or the WP Engine User Portal.
To have your logs offloaded, you must first ensure you have configured a bucket as normal, and have applied the following bucket policy to the bucket. Be sure to replace your-bucket-name with the name of the bucket.
{"Version": "2008-10-17","Statement": [{"Sid": "AllowWpeLogsBackup","Effect": "Allow","Principal": {"AWS": "arn:aws:iam::902500896138:user/wpengine-remote-logs"},"Action": ["s3:ListBucket","s3:GetObject","s3:PutObject"],"Resource": ["arn:aws:s3:::your-bucket-name","arn:aws:s3:::your-bucket-name/*"]}]}
Then, simply reach out to WP Engine Support and let us know you’d like your logs configured to offload to LargeFS and the following information:
- s3 bucket region
- s3 bucket name
- s3 path (optional, see note below)*
Once access is verified, the logs will begin exporting a copy to your S3 bucket each night. If you encounter any errors or issues with this process please contact Support (available 24/7) in your User Portal for more help.
NOTE
Provide WP Engine Support the S3 path field if you wish to replace the /wpe_logs/environmentname/ directory name with a custom directory name instead.
Custom Log Directory
By default, the files stored to your S3 bucket will be stored in the following format:
Nginx Log:
/wpe_logs/environmentname/nginx/201807051234-environmentname-apachestyle.log.gz
Error Log:
/wpe_logs/environmentname/apache/201807051234-environmentname-access.log.gz
Error Log:
/wpe_logs/environmentname/error/201807051234-environmentname-error.log.gz
If you wish to use a custom folder name for your logs, use the bucket policy below instead–remember to replace your-bucket-name with the name of your bucket and your-log-folder with the name of the folder you would like to use:
{
"Version": "2008-10-17",
"Statement": [
{
"Sid": "AllowWpeBucketRead",
"Effect": "Allow",
"Principal": {
"AWS": "arn:aws:iam::902500896138:user/wpengine-remote-logs"
},
"Action": [
"s3:ListBucket"
],
"Resource": [
"arn:aws:s3:::your-bucket-name",
"arn:aws:s3:::your-bucket-name/*"
]
},
{
"Sid": "AllowWpeLogFolderWrite",
"Effect": "Allow",
"Principal": {
"AWS": "arn:aws:iam::902500896138:user/wpengine-remote-logs"
},
"Action": [
"s3:GetObject",
"s3:PutObject"
],
"Resource": [
"arn:aws:s3:::your-bucket-name/your-log-folder",
"arn:aws:s3:::your-bucket-name/your-log-folder/*"
]
}
]
}
Known Limitations
When using LargeFS, you are storing your website images in a separate service via Amazon S3, those files no longer exist on WP Engine servers. For this reason the following items are known to not work with LargeFS.
- Gravity Forms Plugin
- Woocommerce Product Downloads
- WordPress Download Manager Plugin
- BuddyPress
- Image Compression Plugins
- Image Resizing Tools
- Hard or Absolute Server Paths
- Duplicate media file names
- Copying To and From Environments
- Deleting Images
- Network Out Bandwidth
- Any files which require APACHE PROXY PASS
Below further information can be found on these limitations and incompatibilities.
Gravity Forms
If you use Gravity Forms for uploads this will not work with LargeFS. This feature uses hardcoded server paths which means assets must load directly from the WP Engine server, rather than from LargeFS.
BuddyPress
If you are using the Avatar feature for BuddyPress, let our Support team know at setup that the BuddyPress Avatar and Group Avatar directories needs to be excluded from LargeFS. This feature uses hardcoded server paths which means assets must load directly from the WP Engine server, rather than from LargeFS.
The standard directory paths are:
wp-content/uploads/group-avatars/
wp-content/uploads/avatars/
Image Resizing Tools
TimThumb and other PHP-based dynamic image resizing tools. These systems use a PHP script to manually resize images as they are requested, requiring the images to be on the server itself. As a result, these dynamic resizing tools will not work with LargeFS.
However, WordPress has image resizing built in natively now via srcset, so these additional tools should no longer be needed. The built-in image resizing in WordPress works normally with LargeFS.
Image Compression Tools
WP Smush, EWWW Image Optimizer Cloud, and other image compression tools typically attempt to compress images when they are uploaded. Our LargeFS system waits 10 days after uploading the files to send them to your S3 bucket, so in most cases there are no conflicts.
However, if you ever change thumbnail sizes or need to regenerate thumbnails, this could require pulling your images back down from your S3 bucket to your server. You can use the steps in our Moving Buckets guide to assist in copying files to your local machine and then uploading them via SFTP.
Copying Environments
The assets are offloaded to your LargeFS bucket and removed from WP Engine servers. This means if you copy one environment to another images will be missing on the site you’ve copied to. There are two options:
- Support can assist by adding a fallback rule to copied environment
- Set up LargeFS on the new environment and copy the files through S3
It is not typically recommended to use LargeFS on more than one environment within the same site (STG, DEV, PRD).
NOTE
If you need to migrate to another bucket entirely, for example in another region, try our guide.
Hardcoded Server Paths
If you are using a plugin or theme which references images as a path on the server rather than a URL, this may also conflict with LargeFS. Remember, LargeFS sends your images to your Amazon S3 bucket, so they do not live on a hard server path to be referenced in this way. However, calling the images as a URL path will work normally with LargeFS.
An image referenced as a server path that will not work: /nas/content/live/environment_name/wp-content/uploads/myimage.png
An image referenced at a domain path that will work: mydomain.com/wp-content/uploads/myimage.png.
Files Requiring Direct Access
LargeFS should be used for uploads that are called in a page rather than accessed directly. Files that need to be executed or opened directly in the browser should not be uploaded to LargeFS, spefically HTML.
Instead, store these files in a directory outside of those configured to offload to Amazon S3, typically outside of wp-content/uploads/.
Duplicate Media File Names
Media files should have unique names prior to uploading them to your website. This is to prevent files using the same name from being overwritten after the original has been offloaded to S3.
If a file is uploaded to your website as image.jpg it will be offloaded to S3 shortly after and no longer be found on the local server. If you proceed to upload a new image a few days later also titled image.jpg it will be offloaded to S3 overwriting the previously uploaded version.
The best way to ensure your media files remain unaffected is to develop and use a unique naming structure for media files prior to uploading them to the website.
Deleting Images
If a asset is deleted from the WordPress media library, the image must manually be deleted from the S3 bucket as well. The LargeFS sync off of WP Engine will not remove files that were deleted from WordPress.
Bandwidth
LargeFS is used to reduce disk usage on your WP Engine server, and it does not affect loading times or bandwidth usage. Our servers are still serving as a proxy to load the AWS content over your site with the proper URLs, so bandwidth is not reduced with LargeFS.
Network Out Bandwidth
When configuring your Amazon S3 bucket, you agree to some terms and conditions with Amazon. One of these terms is accepting terms of payment for Network Out bandwidth usage for your bucket. Another is the storage usage with Amazon. Be sure to inspect the terms and conditions for your agreement with Amazon closely, to ensure you understand all charges.
NEXT STEP: Learn how to copy files between Amazon S3 buckets