Get Started

Key Takeaways
Page loading animations can improve User Experience (UX) and reduce bounce rates. Visitors are more likely to stay on a site if they have engaging content to view while waiting for the page to load.
Preloaders are beneficial for video- or image-heavy sites, not text-based ones. They reassure visitors that the site is functioning correctly.
Two main methods for adding WordPress loading animations: plugins or manual setup. Plugins offer ease of use, while manual setup provides more customization options.
Consider using a plugin like WP Smart Preloader for a quick and customizable solution. It can help reduce the risk of users leaving your site during loading.
Creating a custom preloader manually allows for more design flexibility but is a more complex process. It involves developing or downloading animations and adding HTML and CSS code to your WordPress theme.
Leaders should assess their site’s content type and loading speed to determine the necessity of a preloader animation.
Page speed plays a critical role in your website’s performance. If it takes more than a second or two for a page to fully load, that can frustrate users enough to make them leave your site. However, it can help if the visitor has something engaging to look at while the page finishes loading.
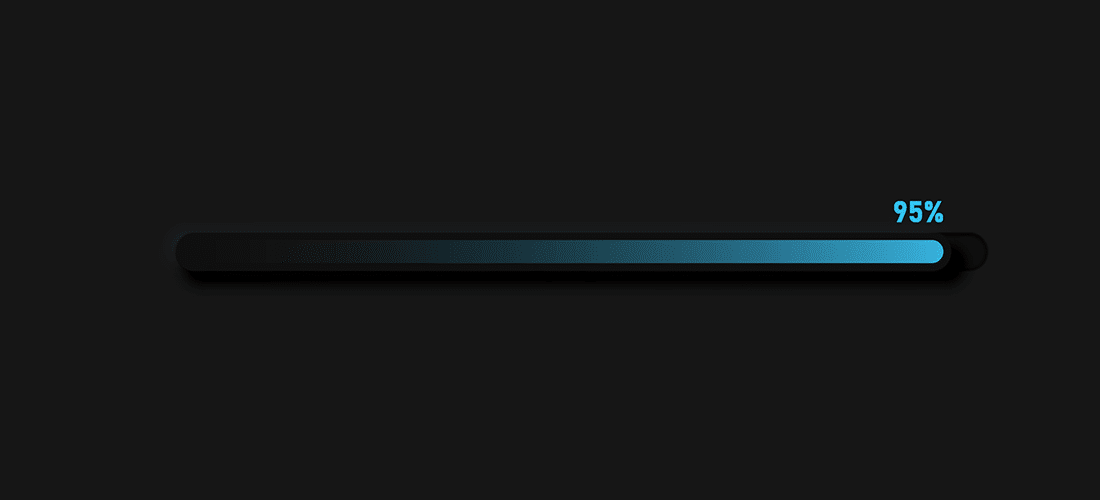
A page loading animation, or ‘preloader animation’, helps inform visitors that a page is loading (it isn’t stuck), and increases the likelihood that they’ll stay on the site. In this way, it can improve the User Experience (UX) and reduce your bounce rates.
In this post, we’ll explain the benefits of preloader animations and when to use one. Then we’ll walk you through your options for adding a WordPress page loading animation. Let’s get started!
What Is a Loading Animation?
A preloader animation, or loading animation, signals to users that a page is actively loading. It’s a simple animation that can be used as a progress indicator for pages that only load certain pieces of content at a time.
WordPress preloaders give visitors something more enjoyable and interesting to look at in the seconds while they wait for the entire page to finish loading. In some cases, they can even offer an estimate of how much time is left.
When Should I Use a Preloader?
A preloader is a smart choice when you have a video- or image-heavy WordPress site that takes a bit longer to load than normal. That way, visitors will be reassured that your site is functioning as intended, and isn’t broken.
However, if your site is mostly text-based, a preloader animation may not be necessary. Instead, it would make more sense to focus on improving your page speed.
Two Options for Adding a WordPress Loading Animation
There are two main methods you can use to add a WordPress preloader animation to your site. You can use a plugin, which is the easier option, or perform the task manually. Let’s take a look at how to get started with both methods.
Option 1: Add a Preloader Animation Using a Plugin
Adding a preloader animation via a plugin is the quicker and easier option for most users. There are a handful of plugins you can use, but we recommend WP Smart Preloader.
This is a free, highly-customizable plugin. It uses CSS and minimal HTML markup to help reduce the risk of users leaving your website as content loads. However, it is important to note that this plugin has not been tested with the most recent version of WordPress, so it’s important to test it out in a local development environment first.
In the following steps, we’ll show you how it works.
Step 1: Download WP Smart Preloader
You can download the WP Smart Preloader plugin via the WordPress Plugin Directory. Then you can upload the .zip file to your WordPress site, by going to Plugins > Add New > Upload Plugin in the admin dashboard:
Another option is to search for the plugin via the search bar on the Plugin > Add New screen:
Either way, once the plugin is installed, click on the Activate button. You can then locate its options under Settings > WP Smart Preloader.
Step 2: Select Your Style
On the WP Smart Preloader Settings page, the first thing to do is select a style for the preloader. Under the Select Preloader section, there will be a drop-down menu letting you choose from six style options, as well as an option for custom animation:
Once you select a style, you can preview it in the window below. If you want to add your own custom animation, you can include your HTML code under the Custom Animation section:
At the end of this screen, you can set the duration for the loader itself and the ‘fade out’ effect:
If you leave these fields blank, the defaults will be set at 1500 milliseconds (1.5 seconds) and 2500 milliseconds (2.5 seconds) respectively. When you’re done, click on the Save Changes button.
Step 3: Preview Your Preloader Animation
Once you’re done configuring your settings, visit your WordPress site in a new browser tab to preview the preloader animation. You can go back to make any stylistic changes as needed. Once you’re happy with the preloader, it will be set up and ready to go.
Option 2: Add a WordPress Loading Animation Manually
If you’re not interested in using a plugin, you can still add this feature to your site manually. The main advantage of creating a custom preloader is that you have more flexibility in how it’s designed.
Of course, it’s also a more difficult process. Next, we’ll walk you through how to create, upload, and format a custom preloader animation for your WordPress site.
Step 1: Brainstorm Your Loading Animation
The first step is to decide what kind of animation you’re going to use. You might research other preloader animation tools to get an idea of the style you like. There are some free animations you can use and explore on Codepen, which can be a great way to get some ideas.
Step 2: Develop or Download Your Loading Animation
To develop your animation, you can use a tool such as Photoshop to create a GIF or a spinning preloader animation. You can also refer to our resource on creating WordPress animations using CSS.
We recommend the latter approach, as adding a GIF preloader to your WordPress site is best done with a plugin. In addition to Codepen (mentioned above), you can also download an animation from sites such as Spinkit and LoadLab.
For this tutorial, we’ll use a preloader animation from Spinkit. Regardless of where you get your animation from, you’ll need its CSS source code to manually add it to your WordPress site:
Most free preloader animations will include a source link, where you can find both its HTML and CSS:
Keep in mind that you can also use the CSS source code from a preloader animation, and then later customize it to your liking.
Step 3: Create a Child Theme
Once you have your animation, you can add it to your WordPress site. The safest way to do that is to set up a child theme. If you’re not sure how to do that, you can review our tutorial on how to create a WordPress child theme.
Step 4: Add HTML Code to Your Theme’s header.php File
The next step is to locate the header.php file for your WordPress theme. You can do this via the WordPress Theme Editor screen:
You can also edit the files using an FTP client such as FileZilla. The file will be located in the wp-content > themes folder in your site’s root directory.
Once you locate and open the file, insert the following HTML code below the body tag:
<!--CSS Spinner-->
<div class="spinner-wrapper">
<div class="spinner"></div>
</div>
Adjust or add whatever HTML code is necessary for your particular WordPress preloader animation, and save the file.
Step 5: Add the CSS Code to Your Stylesheet
Now it’s time to add CSS to style your animation. Locate the CSS stylesheet (style.css) for your WordPress theme, then copy and paste the CSS source code for your animation. In our case, we’ll be adding the following:
.spinner {
  margin: 100px auto;
  width: 50px;
  height: 40px;
  text-align: center;
  font-size: 10px;
}

.spinner > div {
  background-color: #333;
  height: 100%;
  width: 6px;
  display: inline-block;

  -webkit-animation: sk-stretchdelay 1.2s infinite ease-in-out;
  animation: sk-stretchdelay 1.2s infinite ease-in-out;
}

.spinner .rect2 {
  -webkit-animation-delay: -1.1s;
  animation-delay: -1.1s;
}

.spinner .rect3 {
  -webkit-animation-delay: -1.0s;
  animation-delay: -1.0s;
}

.spinner .rect4 {
  -webkit-animation-delay: -0.9s;
  animation-delay: -0.9s;
}

.spinner .rect5 {
  -webkit-animation-delay: -0.8s;
  animation-delay: -0.8s;
}

@-webkit-keyframes sk-stretchdelay {
  0%, 40%, 100% { -webkit-transform: scaleY(0.4) }
  20% { -webkit-transform: scaleY(1.0) }
}

@keyframes sk-stretchdelay {
  0%, 40%, 100% {
    transform: scaleY(0.4);
    -webkit-transform: scaleY(0.4);
  }  20% {
    transform: scaleY(1.0);
    -webkit-transform: scaleY(1.0);
  }
}
Before you save your changes, remove this part: “margin: 100px auto;”. In its place, copy and paste the following:
position: absolute;
top: 48%;
left: 48%;
Then you can save the file.
Step 6: Add jQuey Code to Make the Loading Animation Work
In order to make your spinner preloader animation work, you’ll need to add a bit of jQuery. To do that, you can navigate back to the header.php file, and insert the following before the closing body tag:
<script>
$(document).ready(function() {
//Preloader
preloaderFadeOutTime = 500;
function hidePreloader() {
var preloader = $('.spinner-wrapper');
preloader.fadeOut(preloaderFadeOutTime);
}
hidePreloader();
});
</script>
Then save your file, and preview your site to make sure the WordPress preloader animation works as intended.
Find More Tips and Guides from WP Engine
Adding WordPress loading animations to your site can help to engage visitors and reduce bounce rates. Plus, you have multiple options for getting the job done quickly.
At WP Engine, it’s our mission to provide tips, tricks, and resources for developers as well as high-quality hosting services for WordPress to help you ensure that your website always looks its best. Learn more about our plans today!